metr-guide
[STATUS: IN PROGRESS]
Metr App is probably™️ the most advanced telemetry app for electric skateboards. As amount of features continued to grow over the years the time has come for the proper guide to explain the basics and some hidden secrets in the app.
This guide will be improving over time and hopefully some day will cover everything the app has to offer. Before you start reading there are two very important things you need to know. In order to use it you must have:
If your skateboard has another controller, the app will not work for you. For example Boosted, Evolve, Mellow, Meepo, WowGo, Backfire have another type of controller and are not compatible.
Contents
🐣 First time setup
⚙️ Metr Pro firmware
📈 Realtime
🐌 Modes
⏺ Records
👤 Account
🛑 Faults
🎓 Expert
⚡️ Discharger
📣 Announcements
⚙️ Settings
🔤 Rename Metr Pro
🌉 TCP Bridge
🔢 Overlay
🔋 DieBieMS
🔋 FlexiBMS
🔋 LLT BMS
🛠 Troubleshooting
🛠 Bluetooth repairing
Frequent issues
🐣 First time setup
Follow the instructions at metr.at/setup
⚙️ Metr Pro firmware
In order to use all applications latest features it is important that your Metr Pro has the latest firmware. You can check it by going to Settings and clicking on the blue gear near the module name.
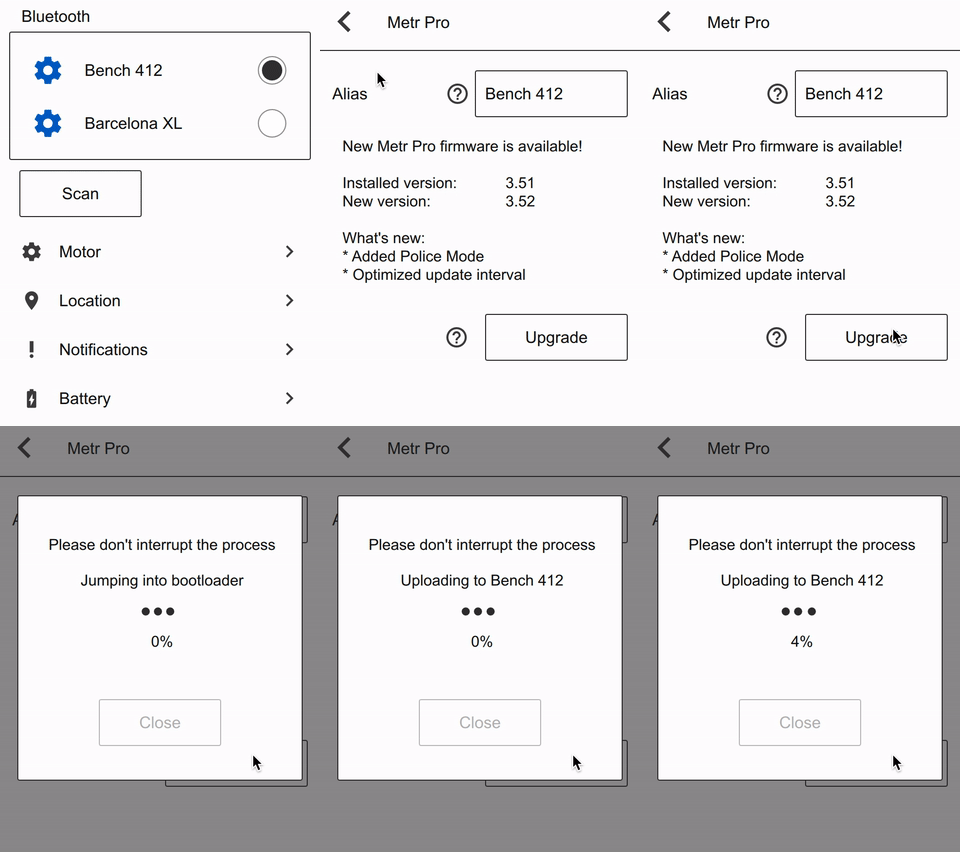
Click Upgrade and wait until firmware update over BLE is complete.
📈 Realtime
Shows values such as voltage, current, temperature from your VESC at any given time. Each value is displayed in it’s own cell. Following cells are available:
- Voltage
- Cell voltage (per cell)
- Battery charge (%)
- Battery current
- Motor current
- ESC temperature
- Motor temperature
- Distance
- Duty cycle (%)
- Amp hours (+regen)
- Watt hours (+regen)
- Speed, GPS speed
- Elevation (above sea level)
- Consumption (Wh/km)
It is possible to arrange/show/hide/resize/recolour cells:
- Long press anywhere on Realtime page to enter Layout Editing mode
- Tap a cell to show / hide
- Drag to change position
- Long press and drag to resize
- Touch colour palette to change colour, long press a colour to expand more colours
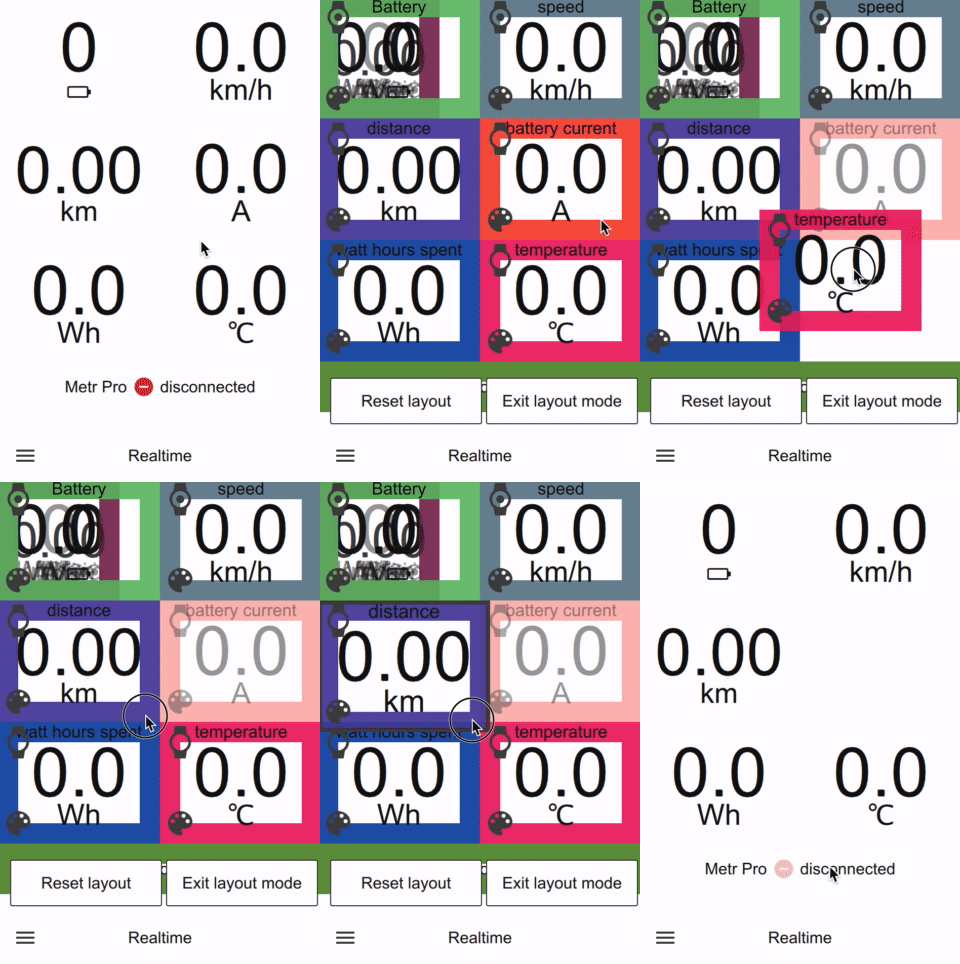
There is an indicator in the bottom which shows currently selected BLE module and connection status, ESC hardware name and firmware version. It blinks every time new packet from VESC is received.

There are 2 Realtime screens available. You can customize any of them.
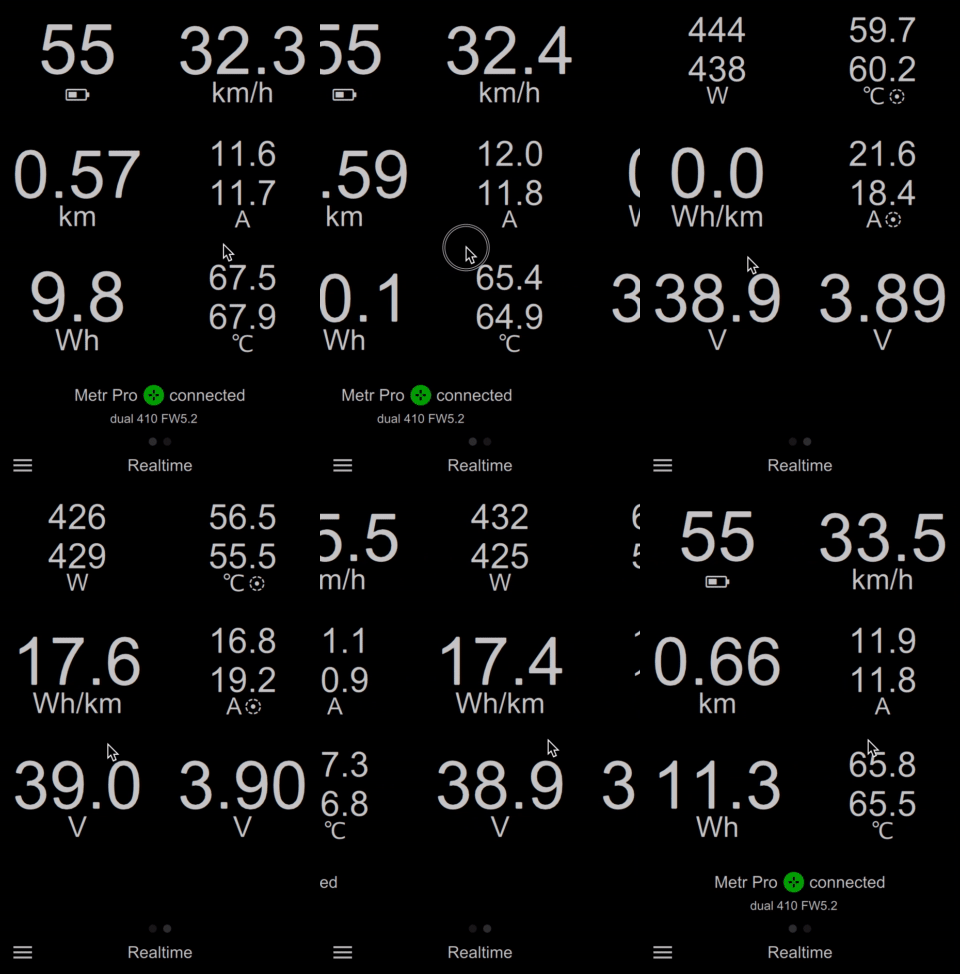
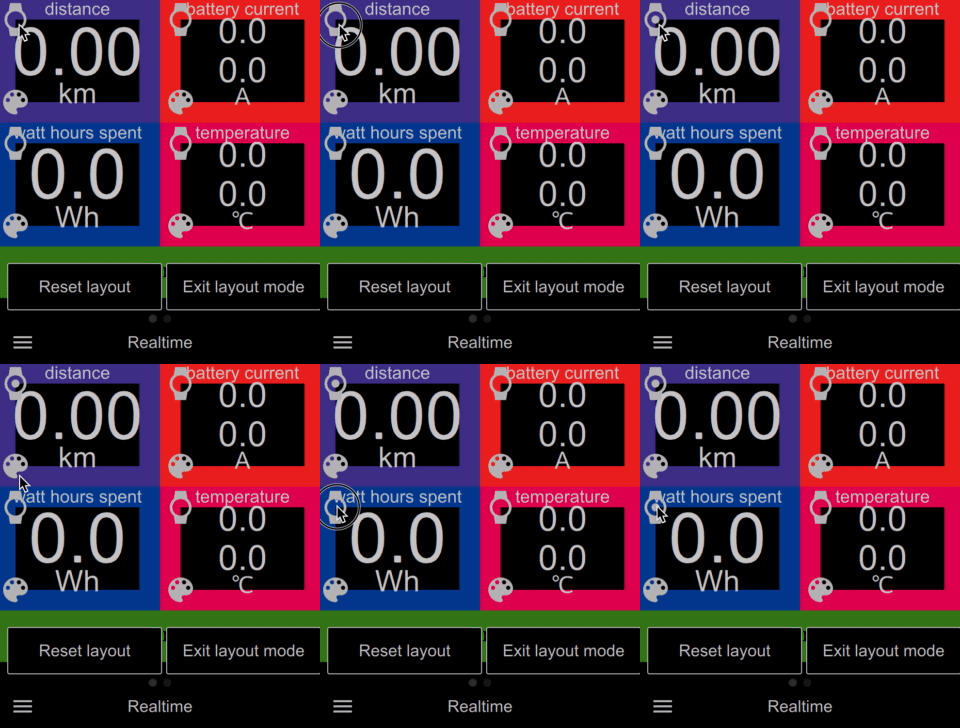
You can click on small watch icons to select which data will be displayed on the smart watch. Apple watchOS and Android Wear is supported. You can select up to 4 cells.
🐌 Modes
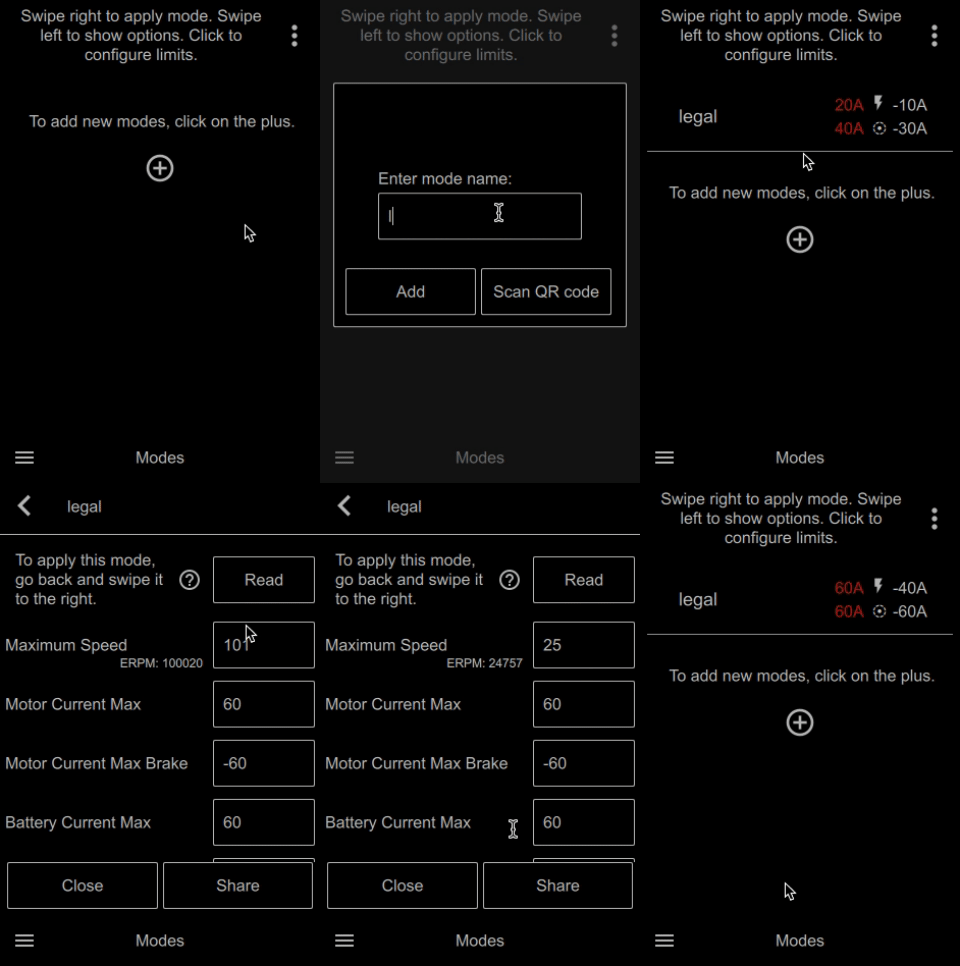
You can setup a number of modes (profiles) to change max speed, acceleration and braking power. The recommended way to create a new mode is to read existing config from VESC and then change values.
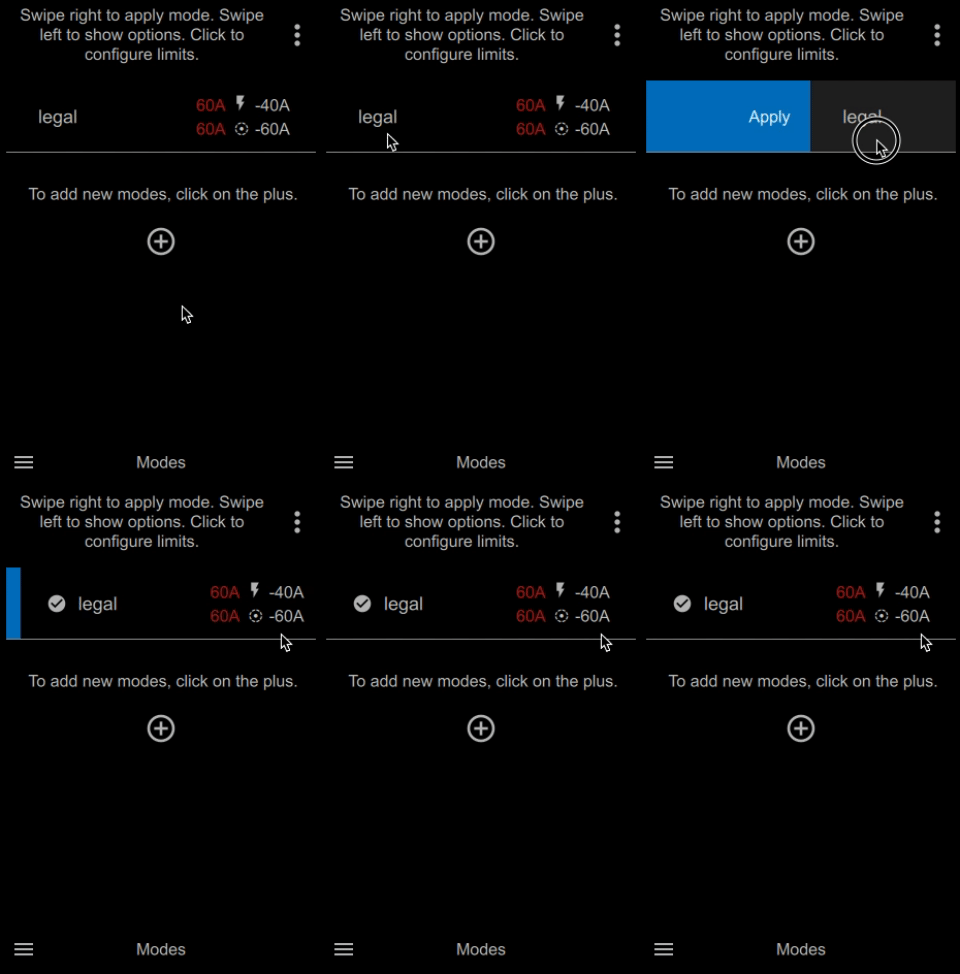
To apply a mode, swipe it to the right. The mode will be automatically applied to all VESCs connected via CAN bus
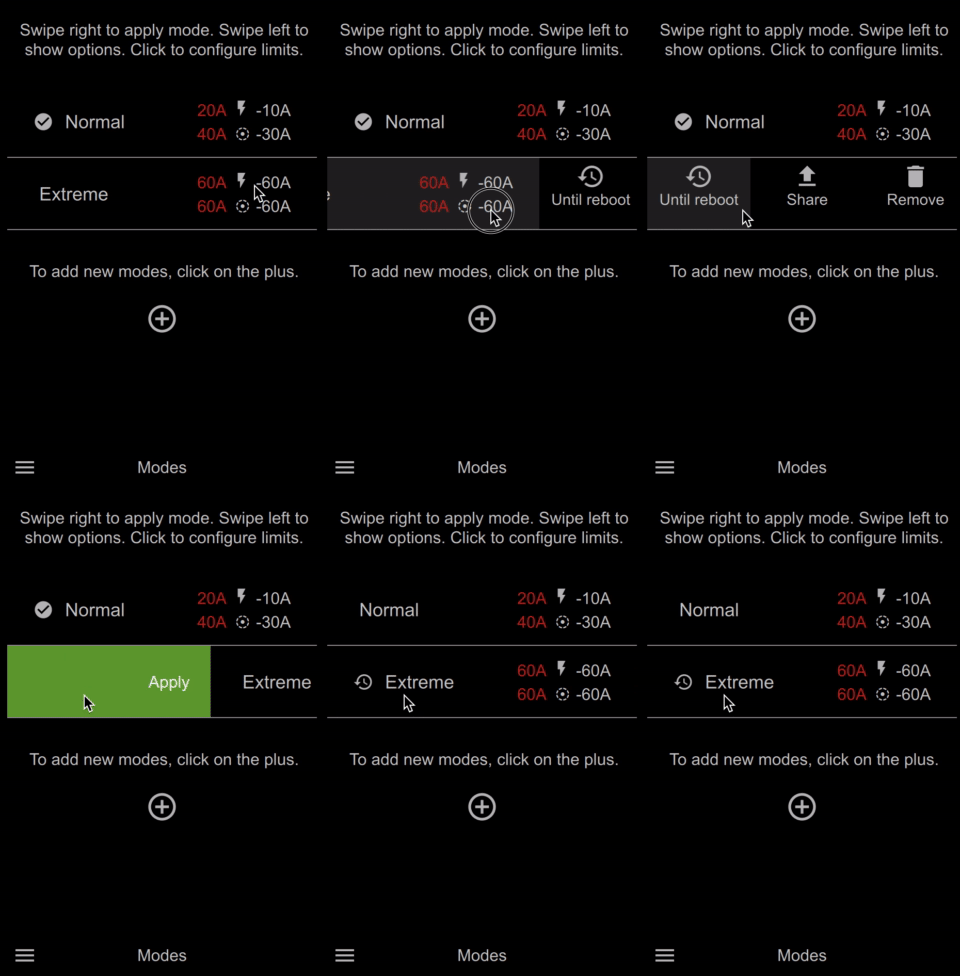
To apply a mode temporarily (until VESC restart), swipe it to the left and click “Until reboot”. After you restart your VESC, it will return to the previous configuration
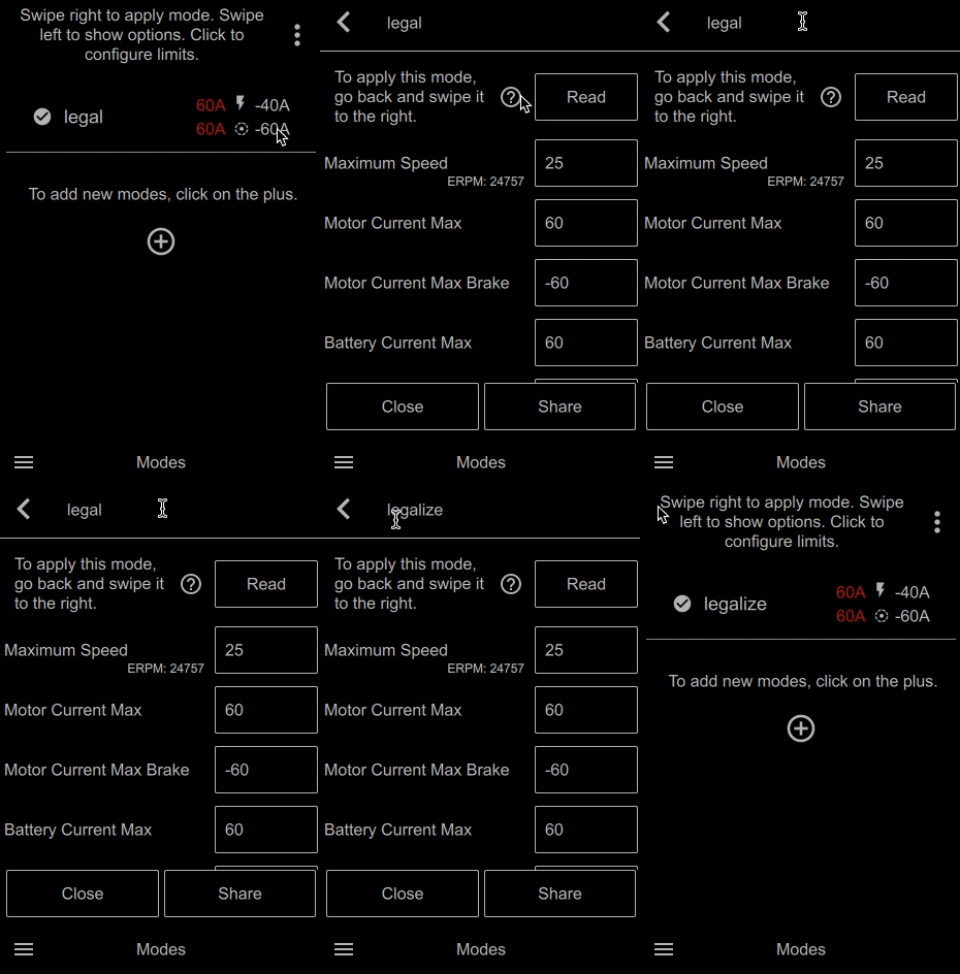
To rename a mode, open it and click on the name
You can also share modes

⏺ Records
Records can be started and stopped automatically (configurable in Settings → Records). If the app is running in the background it will automatically detect selected BLE module, connect to it and start a new record.
To export raw JSON data open your record in the browser and add ?format=json in the address bar.
JSON data format:
{
  "ah":0.49,                         // Total charge consumed, Ah
  "ahRegen":0.02,                    // Total regen-braking charge, Ah
  "altitude":[0,0,-0.1,-0.2],        // Relative altitude change, m
  "appver":"4.6.10",                 // Metr app version
  "consumption":[11.2,11.3,11,10.5], // Consumption, Wh/km
  "current":[-0.02,0.92,2.46,2.38],  // Battery current, A
  "current2":[],                     // Battery current ESC#2, A
  "current3":[],                     // Battery current ESC#3, A
  "current4":[],                     // Battery current ESC#4, A
  "description":"",                  // Long record description, text
  "distance":2353.07,                // Total covered distance, m
  "duration":430471,                 // Total duration, ms
  "duty":[23.7,25.6,25.5,25.7],      // Duty cycle, %
  "elapsed":[359,683,877,1346],      // Time, ms
  "elapsedAh":[0,0.01,0.02,0.02],    // Charge consumed, Ah
  "elapsedAhRegen":[0,0,0,0],        // Regen braking change, Ah
  "elapsedDistance":[0,0,0.5,1.9],   // Covered distance, m
  "elapsedWh":[0,0,0.1,0.1],         // Spent energy, Wh
  "elapsedWhRegen":[0,0,0,0],        // Regen-brakign energy, Wh
  "end":1602758871101,               // Record end timestamp, ms since Epoch
  "escCount":1,                      // ESC count
  "faultCode":[0,0,0,0],             // ESC fault code
  "faultsCount":0,                   // Number of ESC faults
  "fw":"23.46 UNITY",                // ESC firmware
  "latitude":[59.29341,59.29341],    // Latitude, degrees
  "longitude":[18.00459,18.00459],   // Longitude, degrees
  "motorCount":2,                    // Number of motors
  "motorCurrent":[0,1.99,5.7,5.4],   // Motor current, A
  "motorCurrent2":[0,1.6,5.57,5.57], // Motor#2 current, A
  "motorCurrent3":[],                // Motor#3 current, A
  "motorCurrent4":[],                // Motor#4 current, A
  "motorTemperature":[23,23,23,23],  // Motor temperature, C
  "motorTemperature2":[24,24,24,24], // Motor#2 temperature, C
  "motorTemperature3":[],            // Motor#3 temperature, C
  "motorTemperature4":[],            // Motor#4 temperature, C
  "rpm":[16007,16019,16038,15999],   // ESC rpm
  "speed":[16.08,16.09,16.11,16.07], // Speed, km/h
  "start":1602758440630,             // Record start timestamp, ms since Epoch
  "temperature":[26.7,26.7,26.7,26], // ESC temperature, C
  "temperature2":[],                 // ESC#2 temperature, C
  "temperature3":[],                 // ESC#3 temperature, C
  "temperature4":[],                 // ESC#4 temperature, C
  "title":"bad weather,              // Record short description, text
  "version":18,                      // Record format version
  "voltage":[49.1,49,48.8,48.8]      // Voltage, V
}
👤 Account
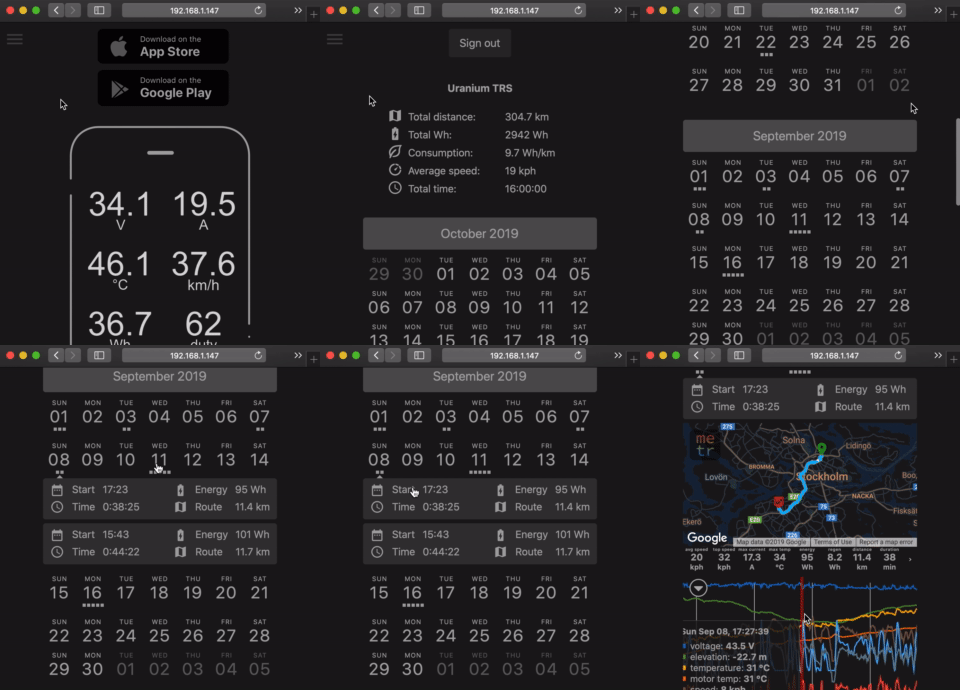
You can sign in to your account at https://metr.at/account and view stats and all records for currently selected Metr Pro module. The sign in is done using public key cryptography instead of a password. You need to have active connection to Metr Pro in order to sign in.
🛑 Faults
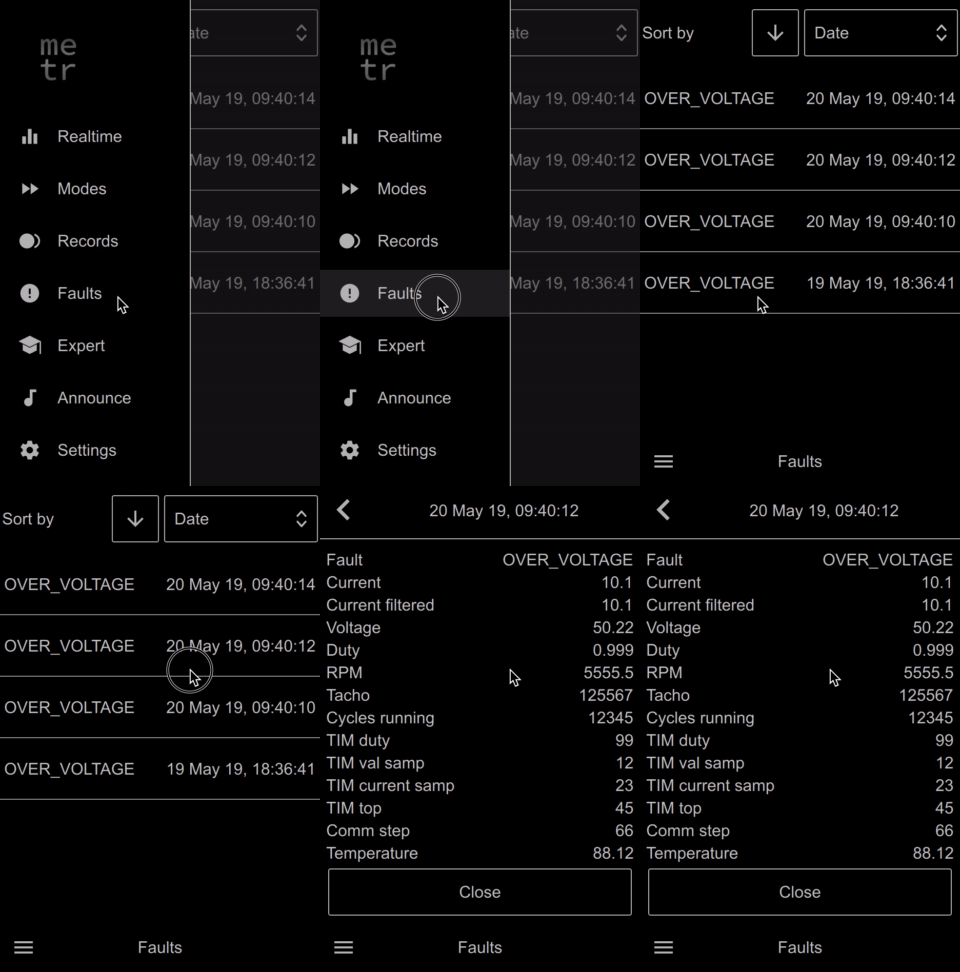
All faults that happen to VESC while it’s connected to the app are recorded and can be seen in a separate tab
🎓 Expert
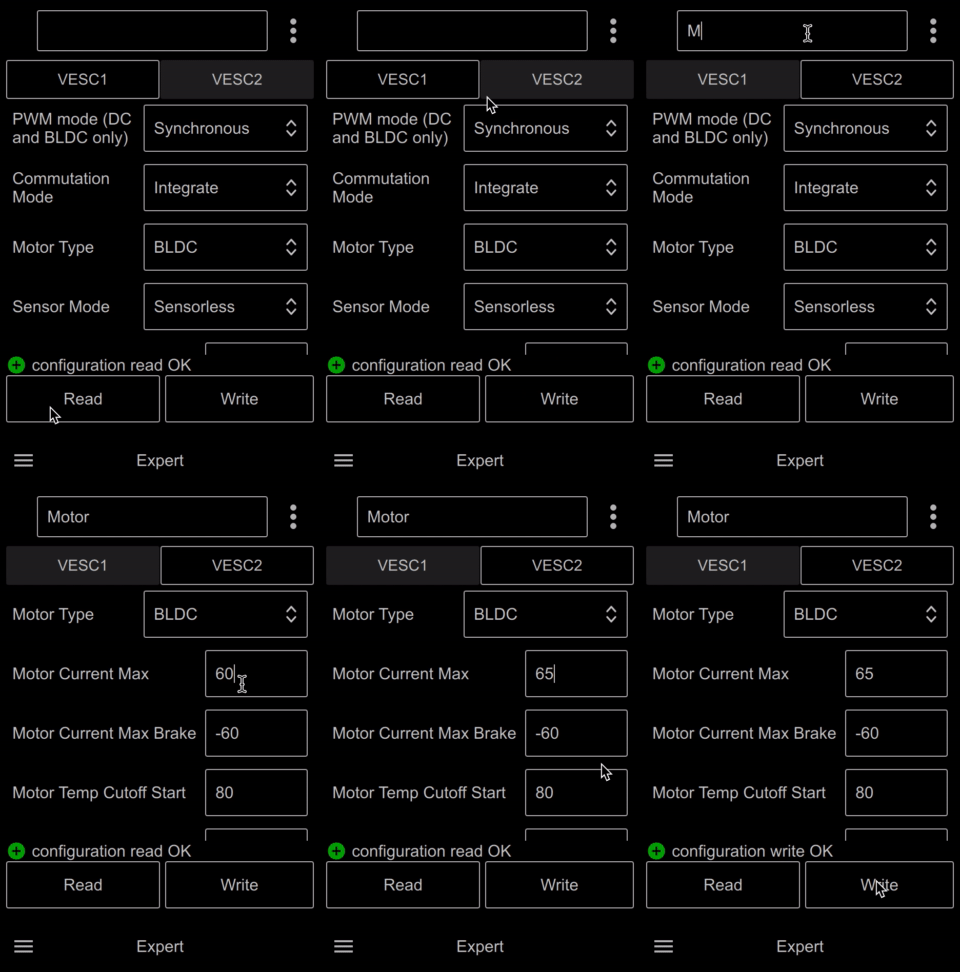
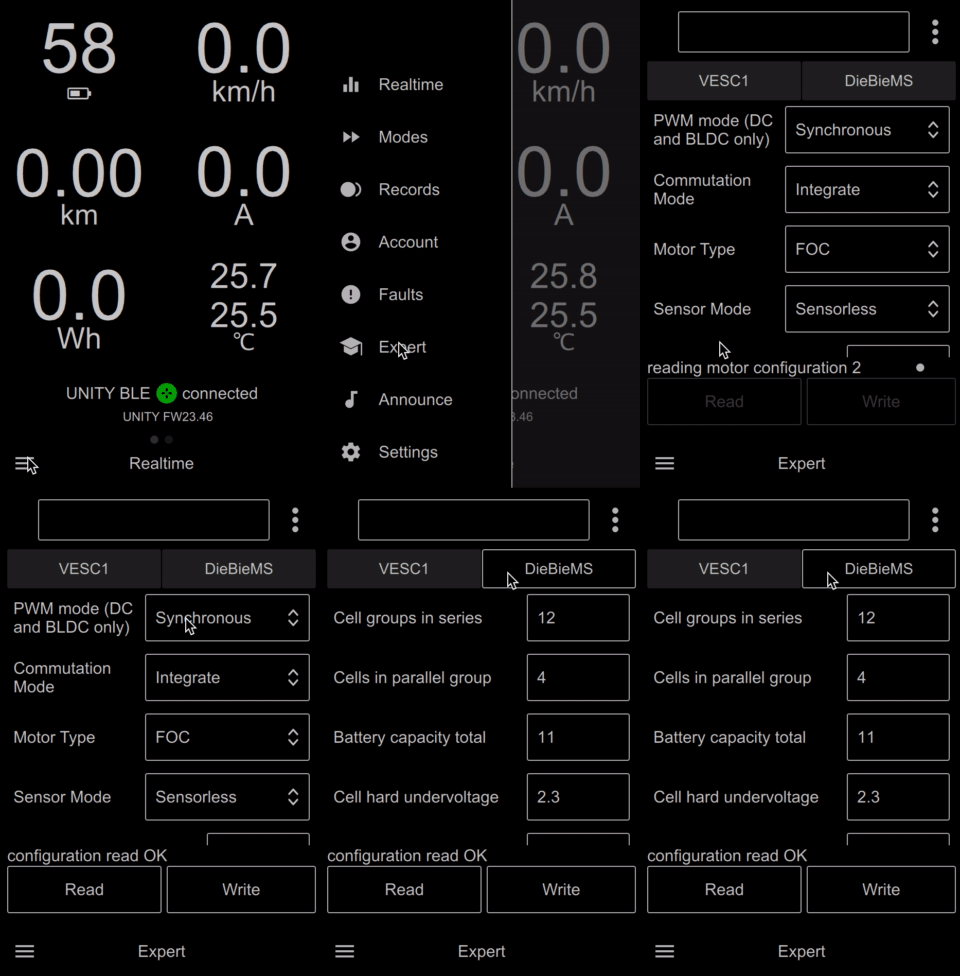
Expert is for expert use only. It allowes to change and tweak all possible configuration parameters on VESC. Both motor configuration and app configuration. It automatically detects all VESCs connected via CAN bus so you can switch between them and change settings. There is a super convenient omnibox to easily search what you want to change
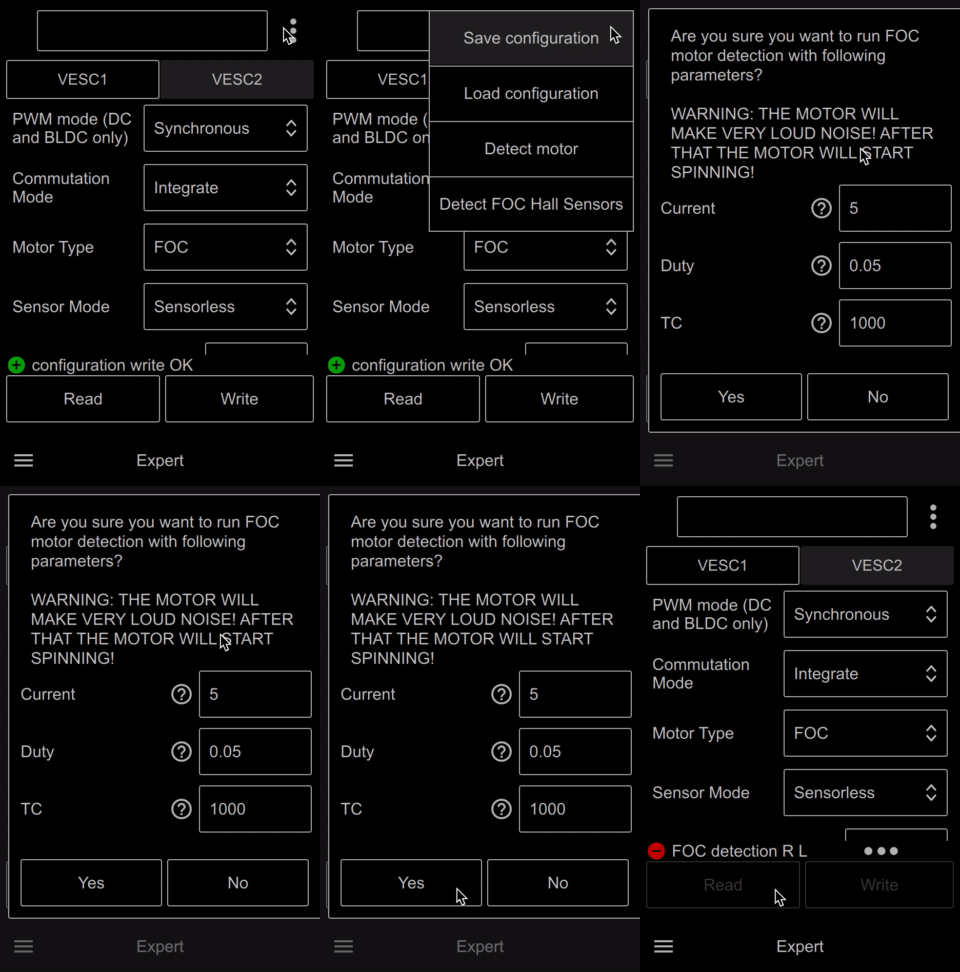
It is also possible to do motor detection (both BLDC and FOC) in Expert. Click menu → Detect motor
Metr app fetches motor and app configuration every time connection is made with Metr Pro and saves a backup. To check history of changes click menu → History.
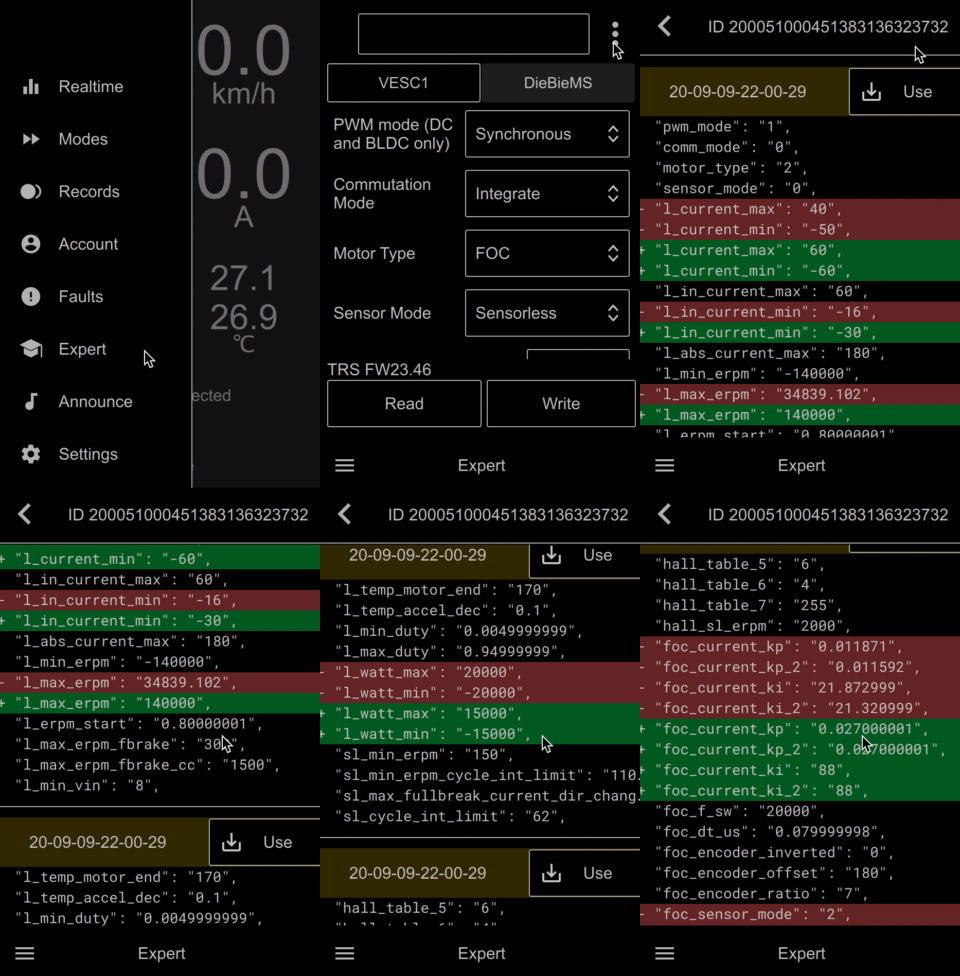
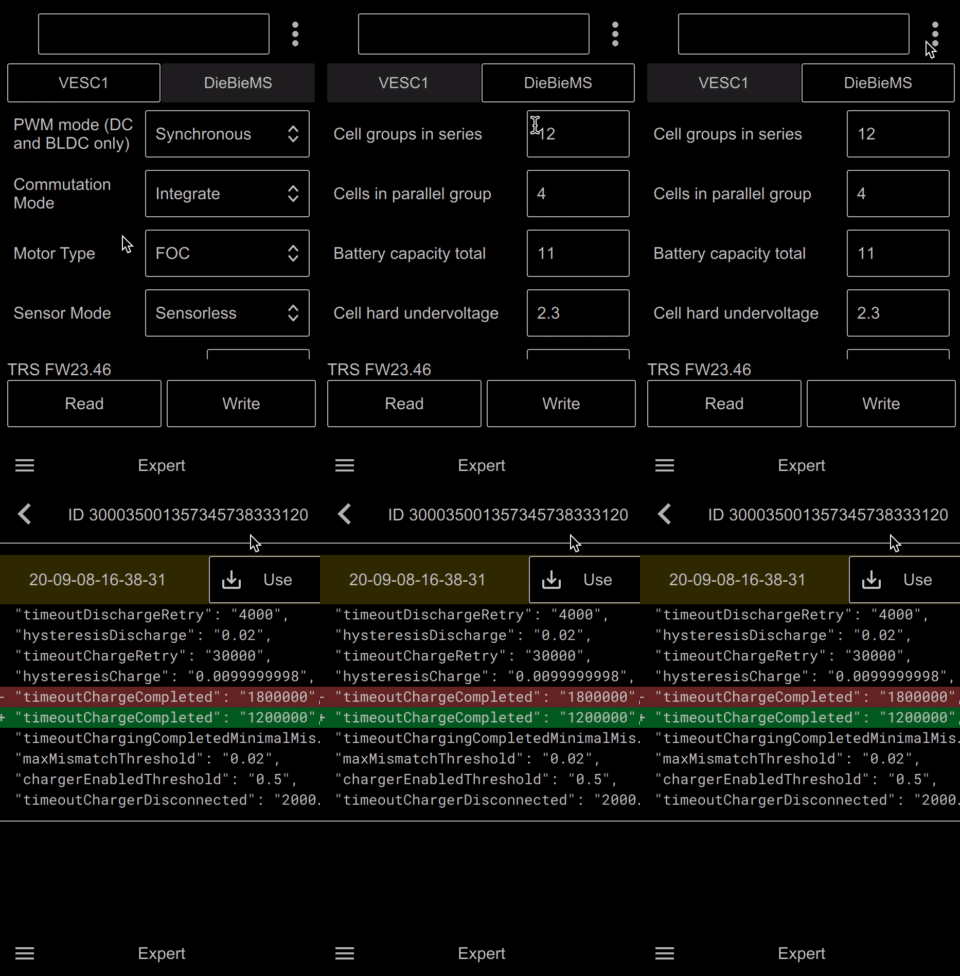
For DieBieMS / FlexiBMS too!
⚡️ Discharger
You want to discharge battery pack in some cases, for example before winter. Storing battery discharged will increase its longevity. Sometimes you think about it too late and the weather is already bad to discharge the normal way. Fortunately there is a feature in metr app to help with that. To use discharger, open Expert tab, click menu → Discharger
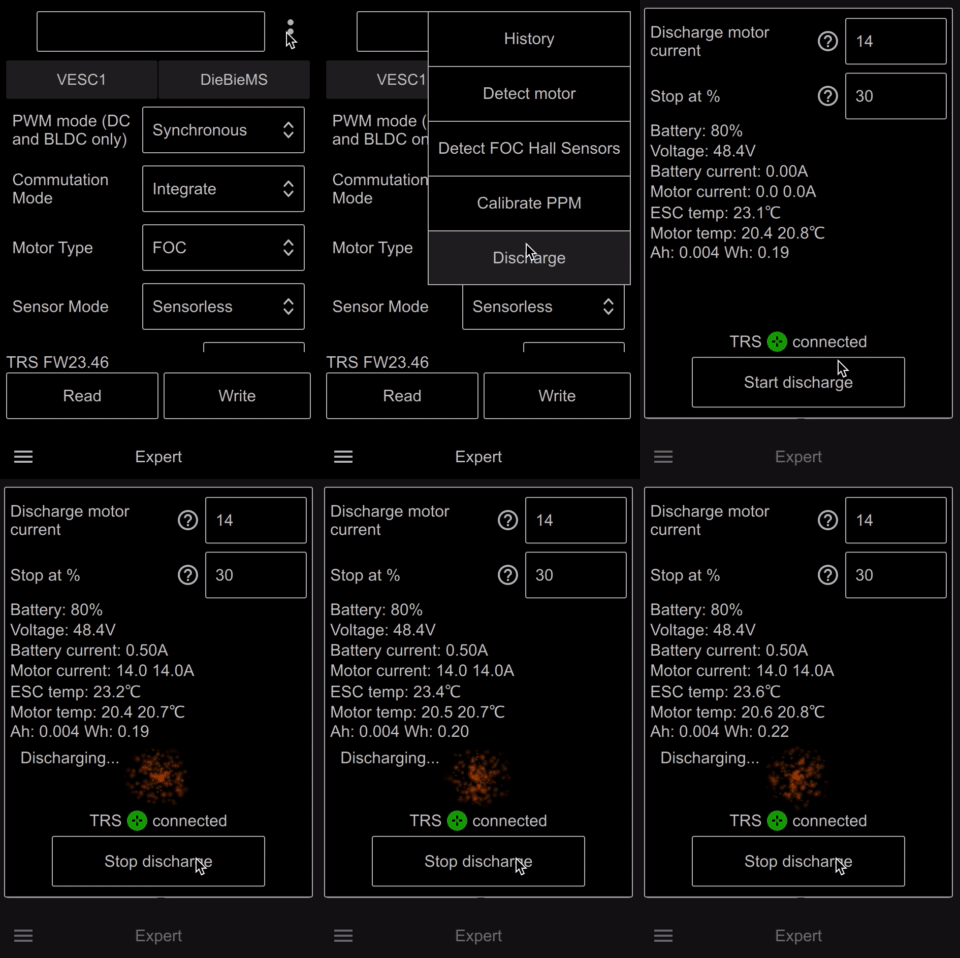
It uses foc_openloop command to discharge battery. Battery current goes through motors, but they are not spinning, just heating.
⏱ Takes several hours to discharge a battery
🌱 Quiet and about 5x faster than freespin
🔢 Uses multiple VESCs/motors over CAN bus
📈 Continuously sends COMM_ALIVE packets and monitors realtime data
🔥 Motor temperature limit 60℃, VESC temperature limit 70℃
✅ Turns off when reached storage level
📣 Announcements
Announcements is a very useful feature that literally tells you realtime data without you having to look at it.

You can customize which kind of data you want to hear and how often.
⚙️ Settings
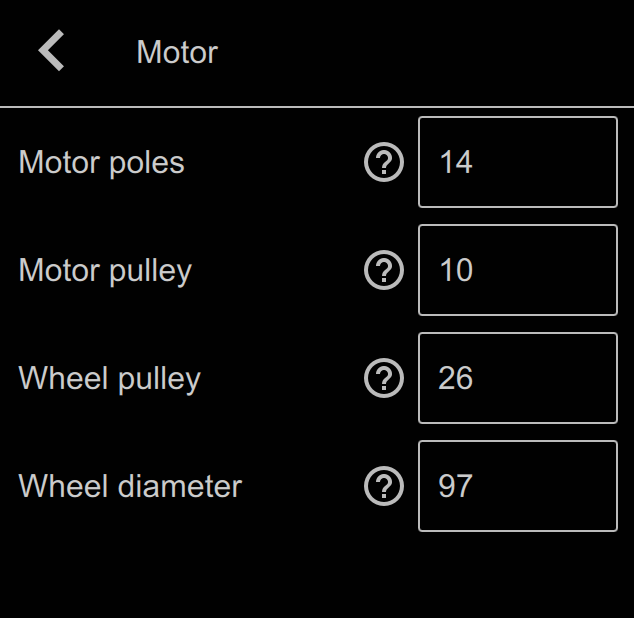
Very importaint, make sure motor settings are configured correctly
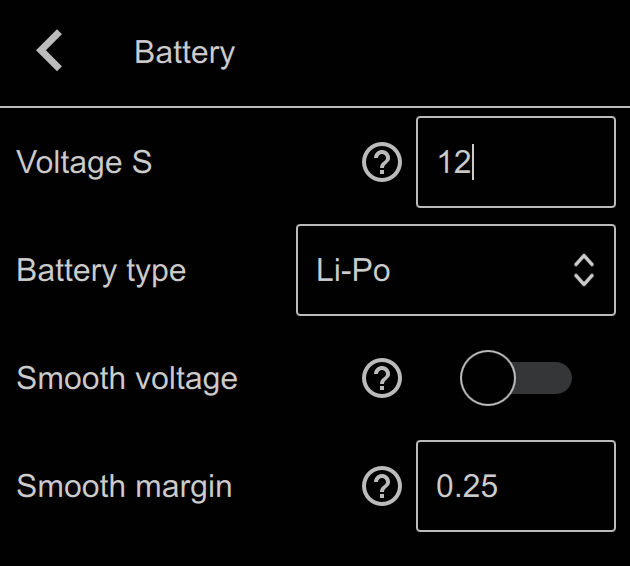
And battery settings
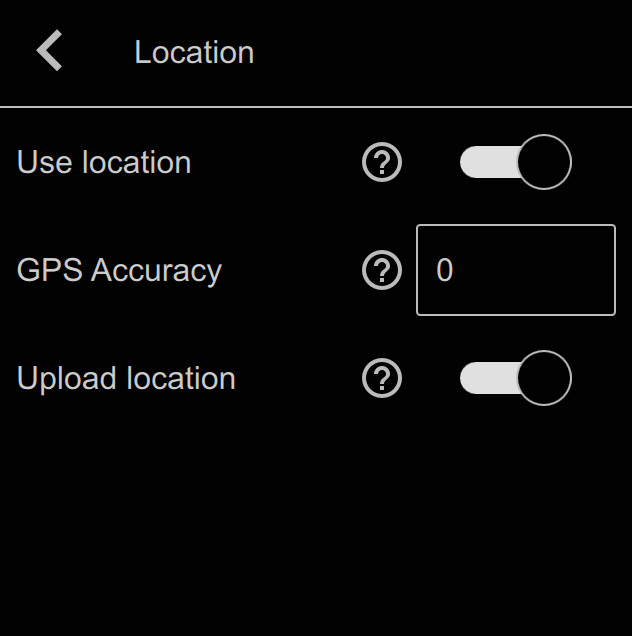
It is recommended to enable Location
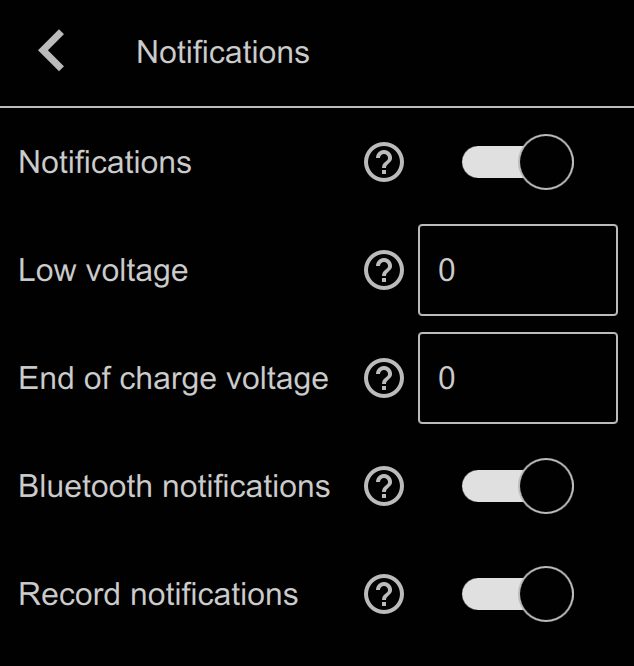
and Notifications
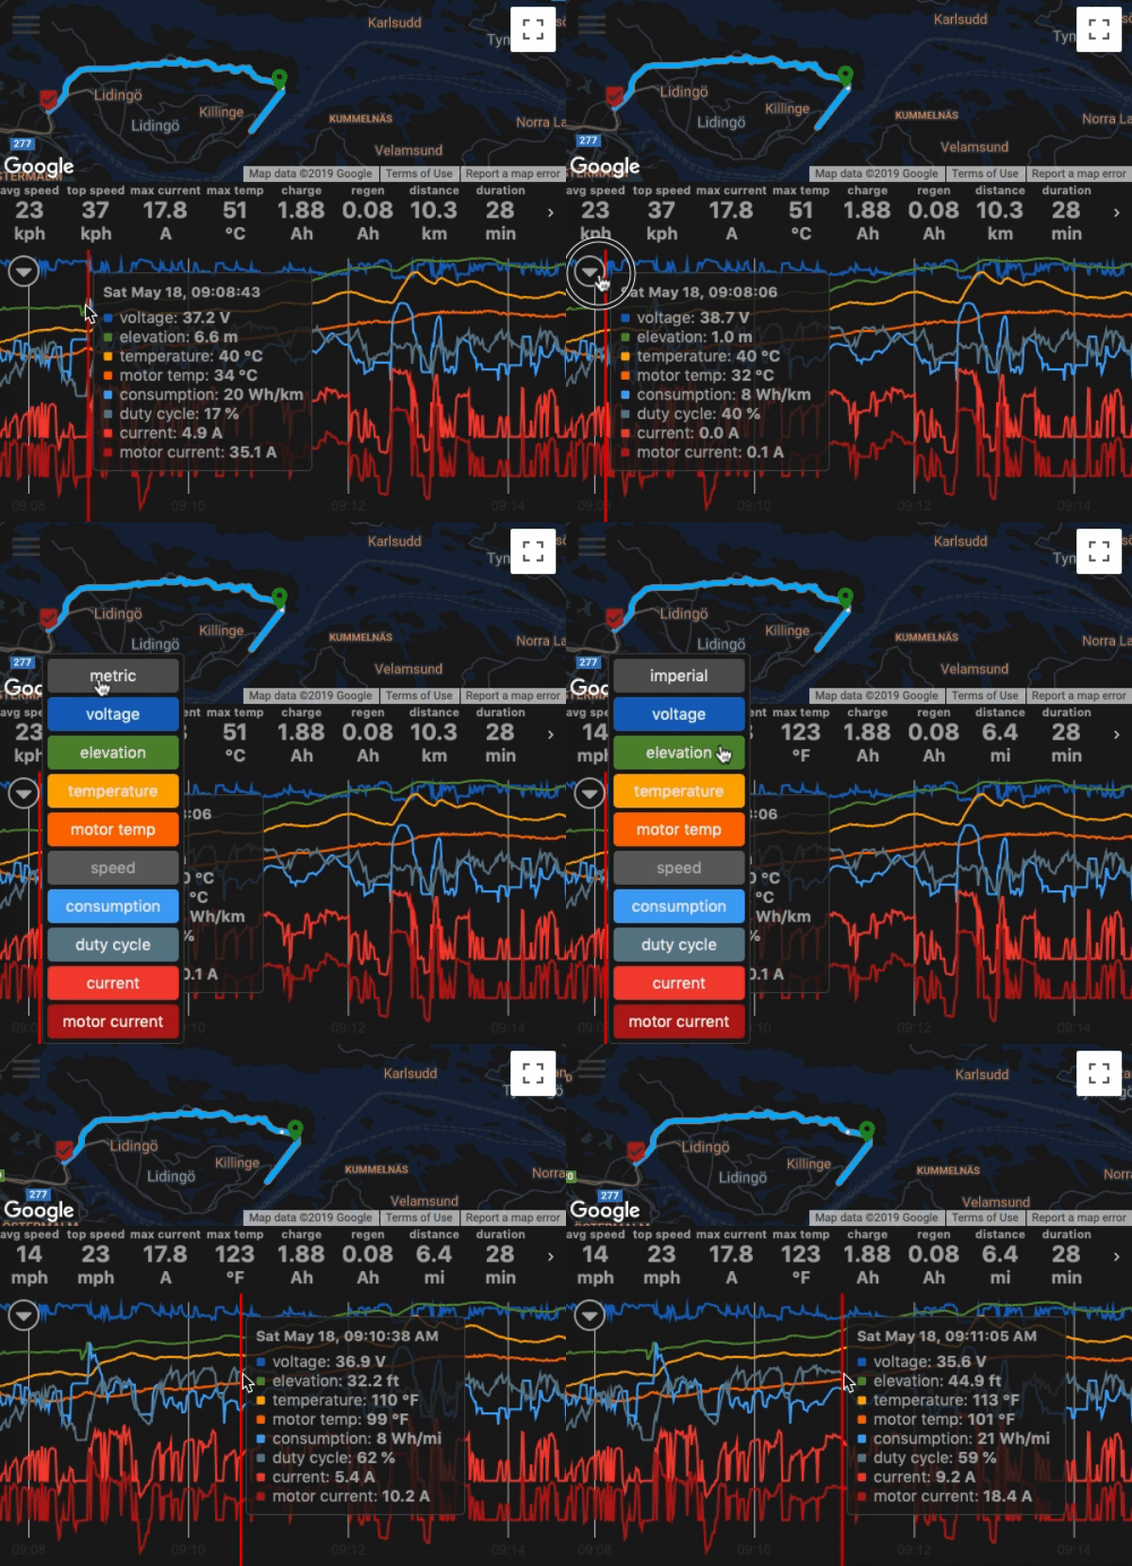
To switch between metric and imperial go to Settings → Miscellaneous

And when viewing a record in a browser
🔤 Rename Metr Pro
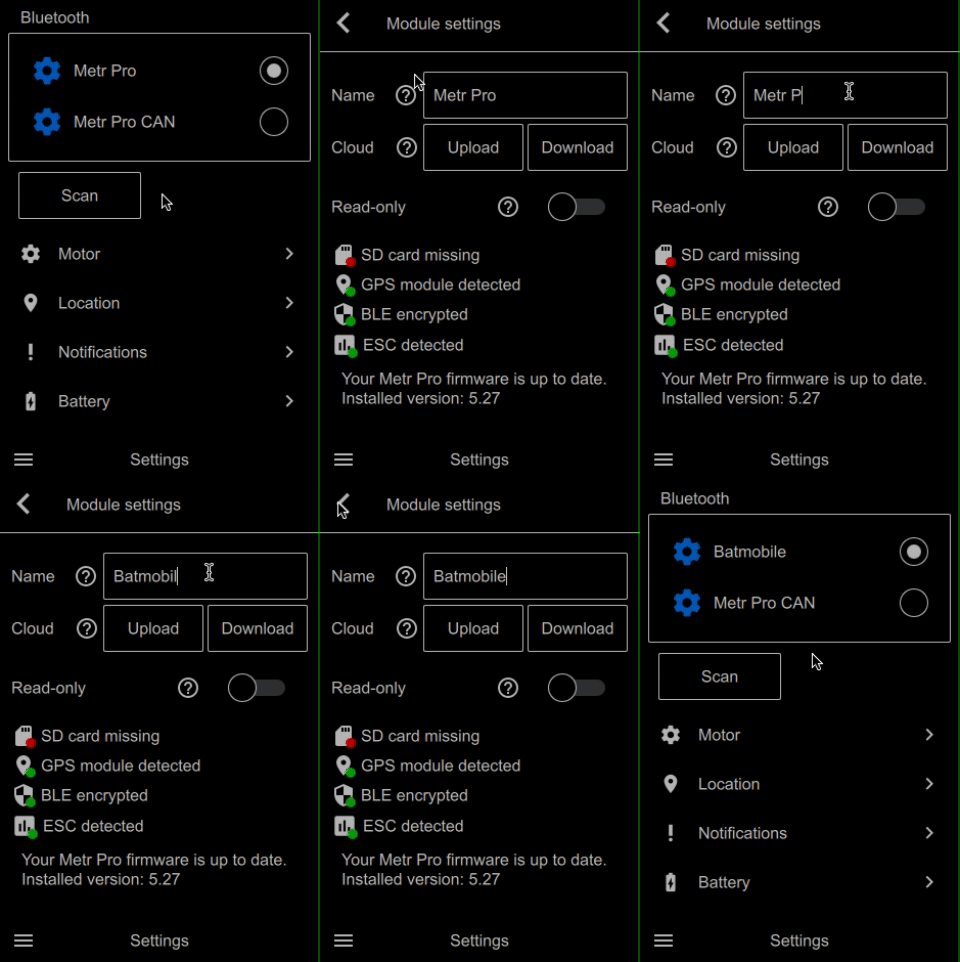
To change Metr Pro name make sure you are connected to it, navigate to Settings tab and click on the blue gear. The new name is sent to Metr Pro and it starts BLE advertising with a new one. Other applications such as VESC Tool will also see the change
🌉 TCP Bridge
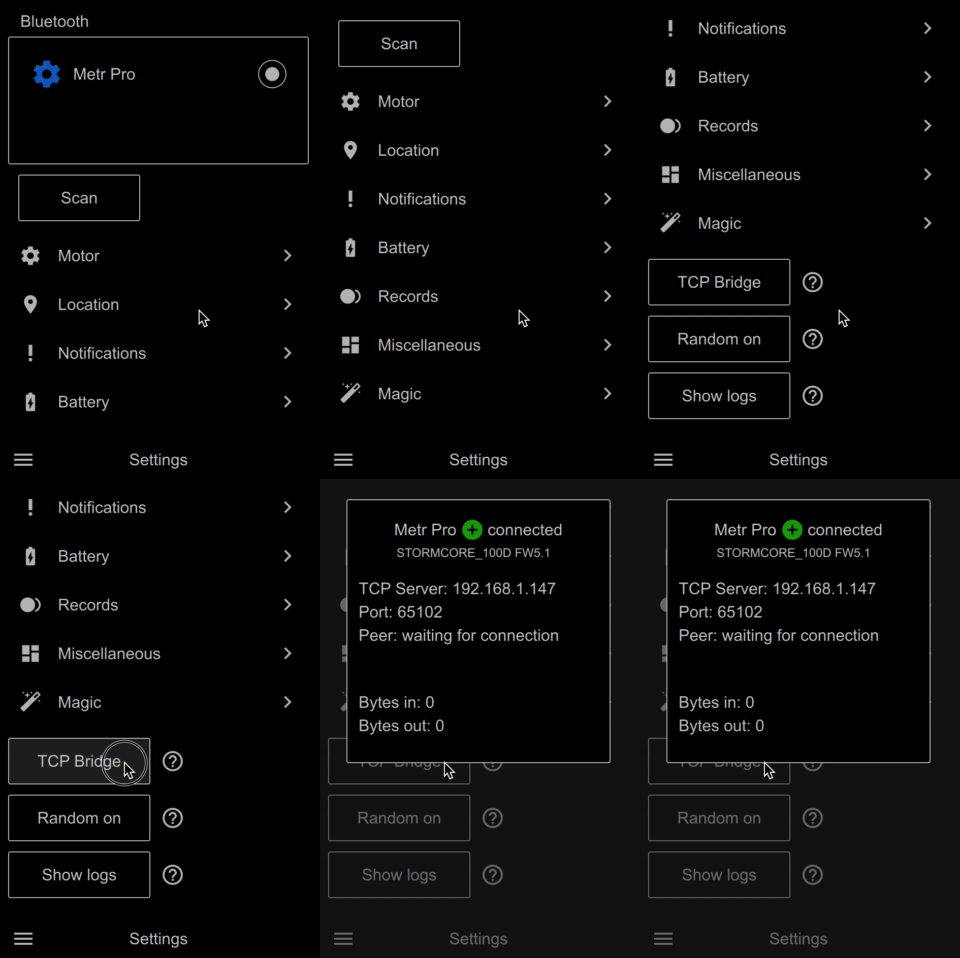
Connect to Metr Pro and start TCP Bridge from Settings tab
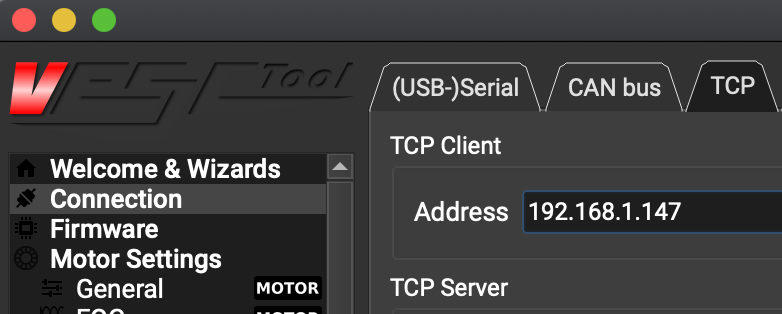
Then open VESC Tool and use the same IP address
🔢 Overlay
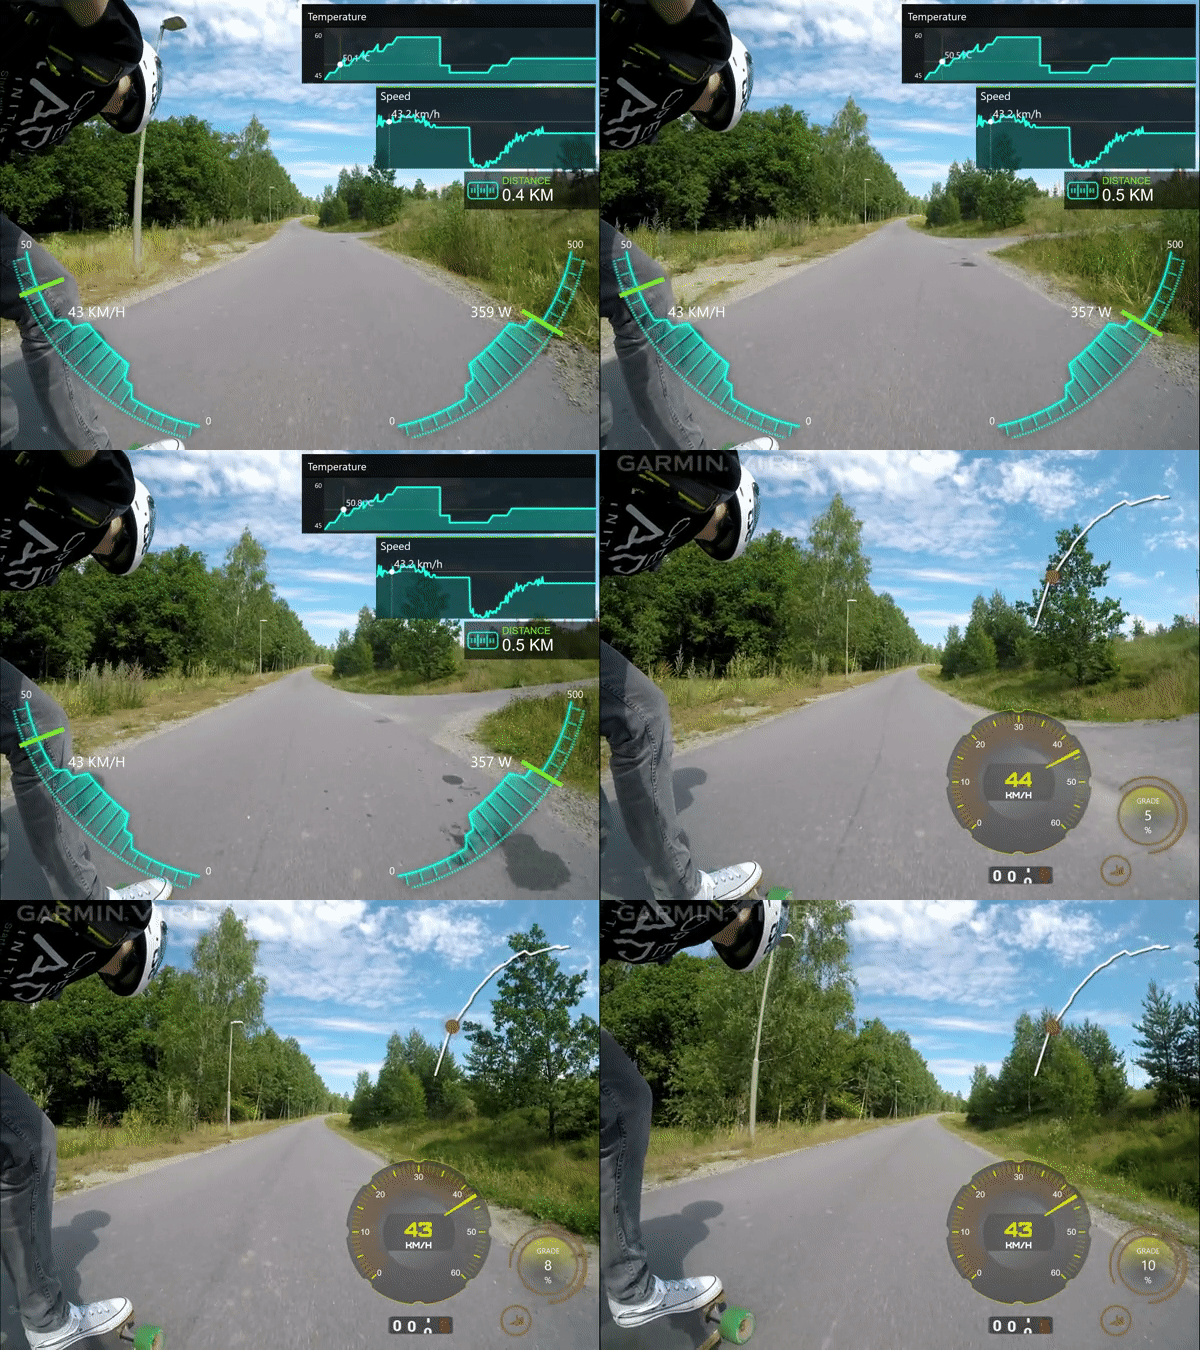
An easy way to add telemetry to your videos. You can film the video with the camera of your choice and record the telemetry data separately with the metr app. Then you combine them together.
Get GARMIN VIRB® Edit
Open your record in the browser and add ?format=fit in the address bar. Wait until telemetry file is downloaded
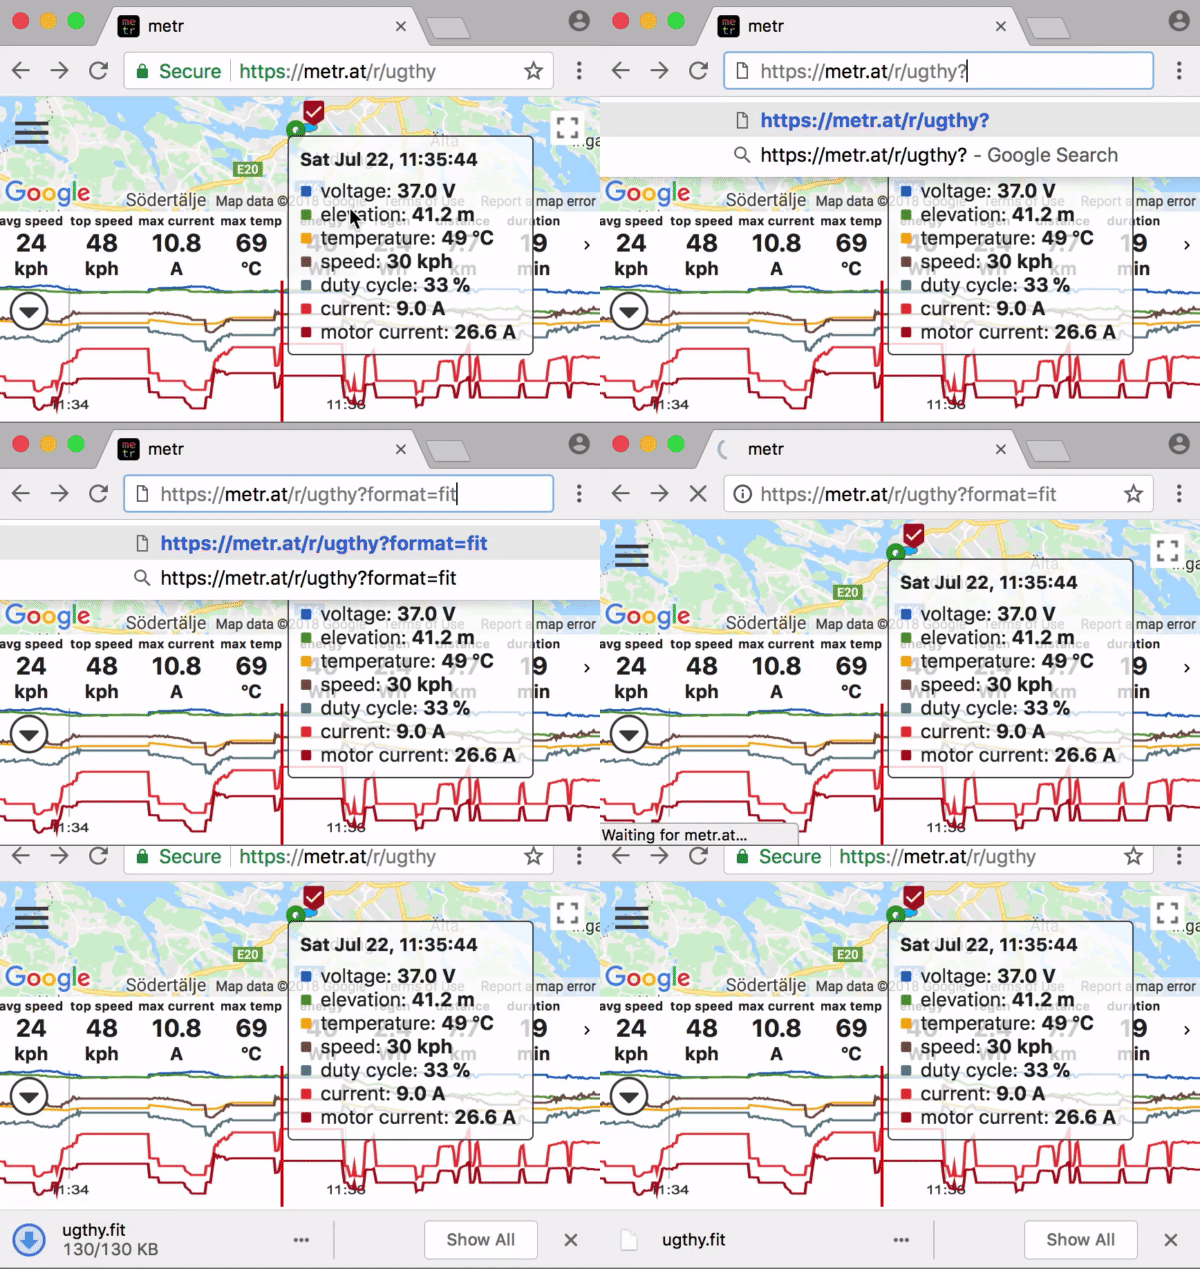
Start GARMIN VIRB® Edit and import your video
Click Import G-Metrix and use the .fit file that you downloaded
🔋 DieBieMS
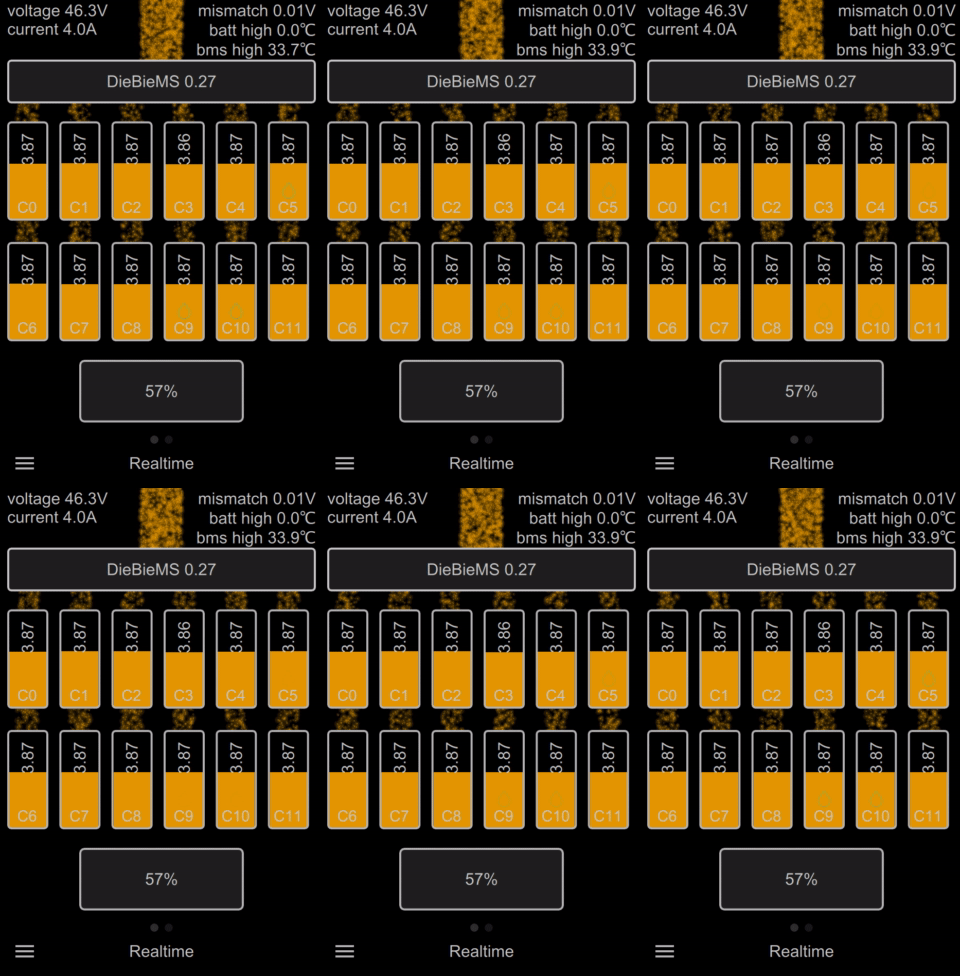
DieBieMS is a smart BMS (Battery Management System). If you have DieBieMS connected via CAN bus it will be automatically detected in the Metr App (no extra setup is needed). DieBieMS provides such information as individual cell voltages and state of charge / discharge, consumption based battery percent data.
To see individual cell voltages, click Battery percent cell on the Realtime page.

When you plug in the charger, DieBieMS view will automatically open and show charging current / balancing state. Glowing dots on the cells mean they are balancing at the moment.
It is possible to configure DieBieMS through the Metr App. When you open Expert page, DieBieMS shows up and you can read / write settings. This is a quick and convenient way to change some settings when you are on the go and don’t have access to full DieBieMS Tool.
🔋 FlexiBMS
FlexiBMS is similar to DieBieMS except it is a charge-only BMS. Please read the previous section DieBieMS.
🔋 LLT BMS
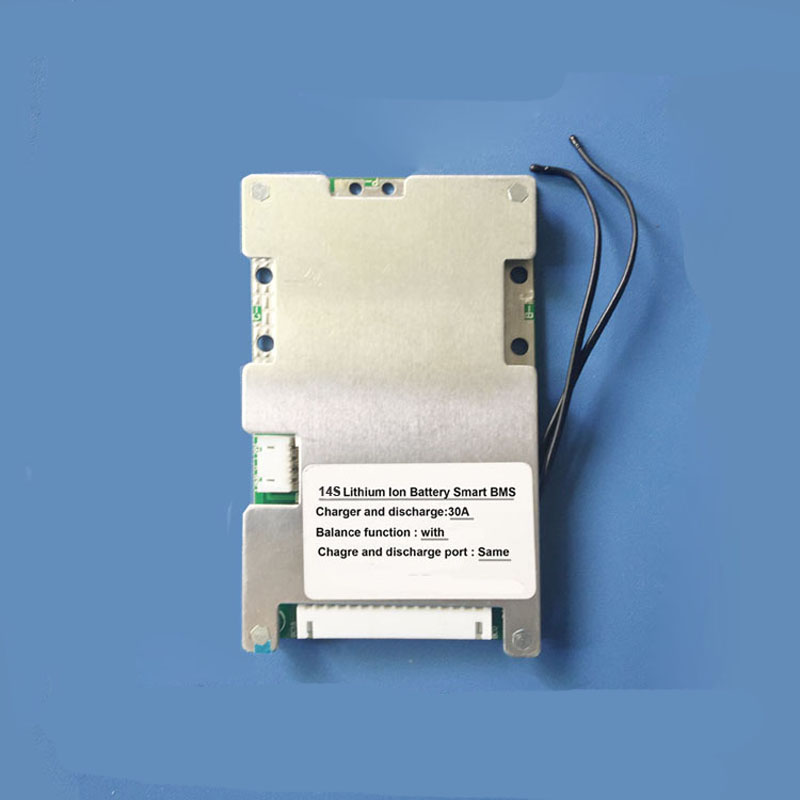
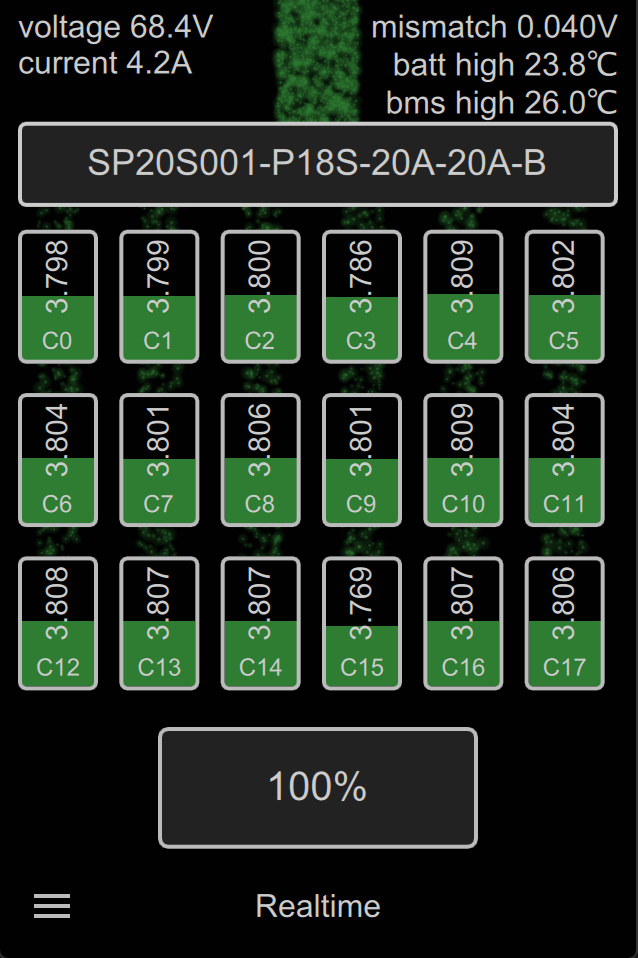
LLT BMS comes with it’s own BLE module instead of CAN bus. It is possible to pair Metr Pro with LLT BMS using following steps:
- Make sure you are connected to Metr Pro
- Navigate to Settings → Battery
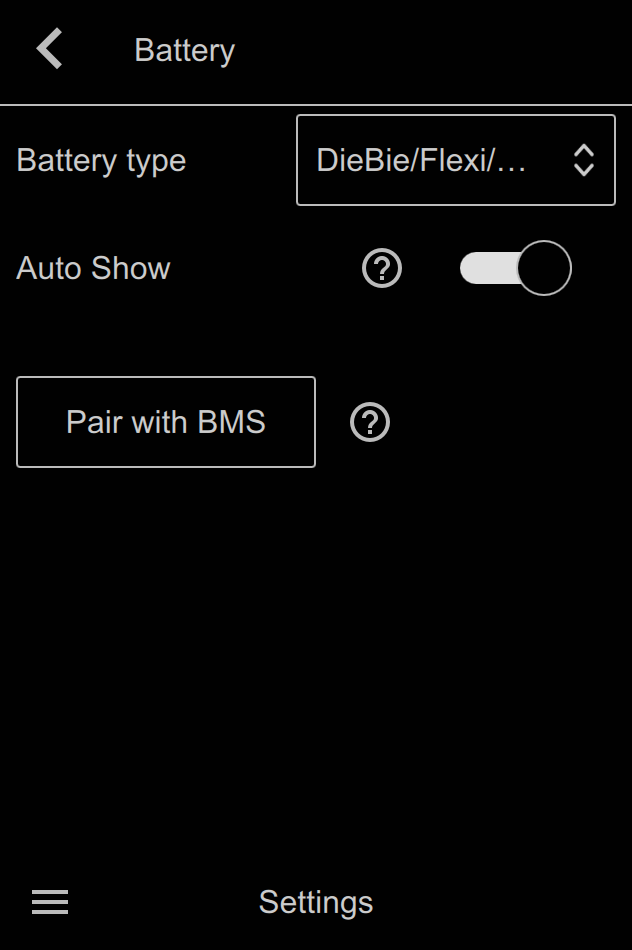
- Click on “Pair with BMS”
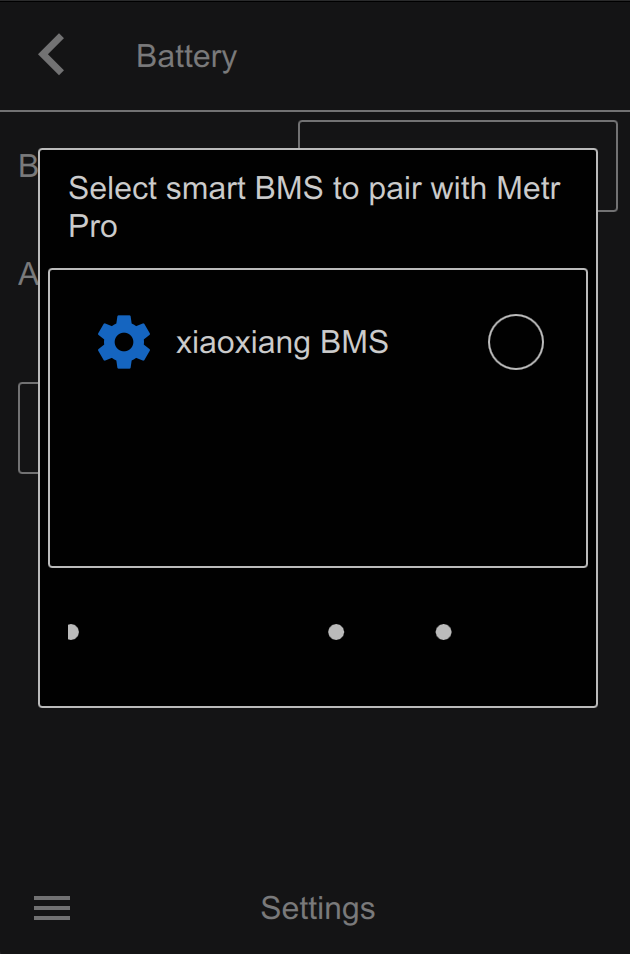
- Select LLT BMS
- Go back to Realtime tab and click on Battery percent cell. You should see cell information
🛠 Troubleshooting
A good advice is to search for information on esk8.news forum and esk8.builders forum. Maybe you will find the solution.
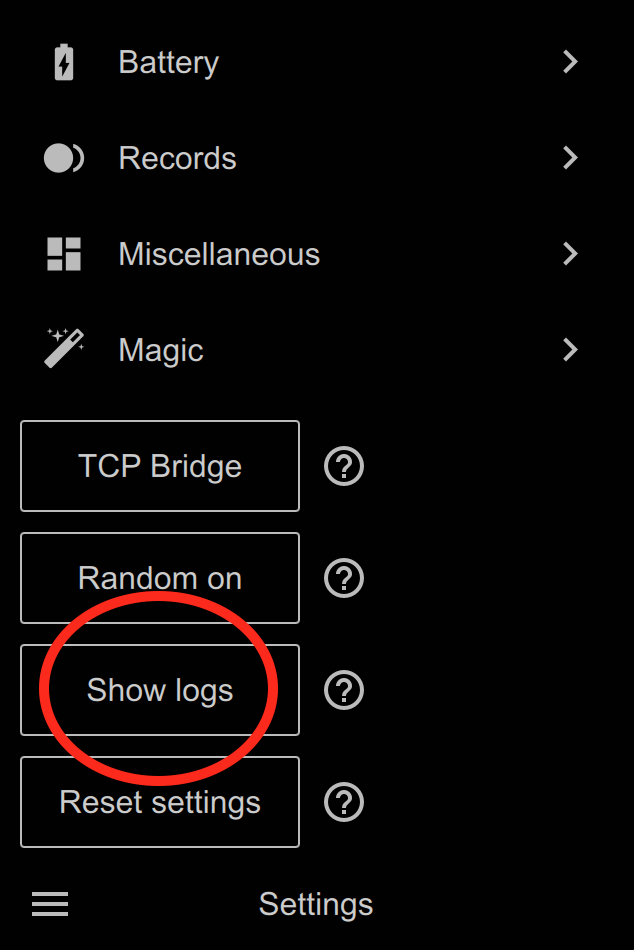
If you didn’t find anything relevant, could be that you found a bug! The bugs are always there🐛 and once in a while a new one pops out. If you want to report it, please collect the log file from the app. Open Settings and click on “Show Logs” button. Send log file toghether with the bug description to support@metr.at, screenshots or video. Log file resets every day so don’t forget to collect it after you experienced the problem.
In case you need to get log file from previous date: on Android open File Explorer and go to your main storage.
Look for the folder Android → data → at.metr.app → data, scroll down and check all .txt files that begin with log_ and find the one with the correct date. Please email this file to support@metr.at. On iOS, if you have a mac, connect your iPhone to it, launch Finder, select your iPhone → Apps → metr.at and collect log file.
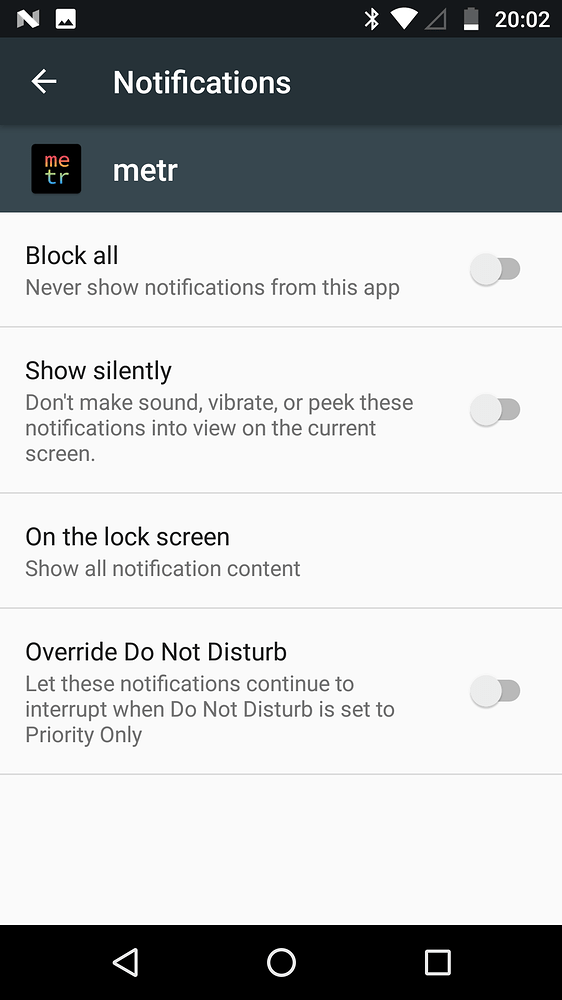
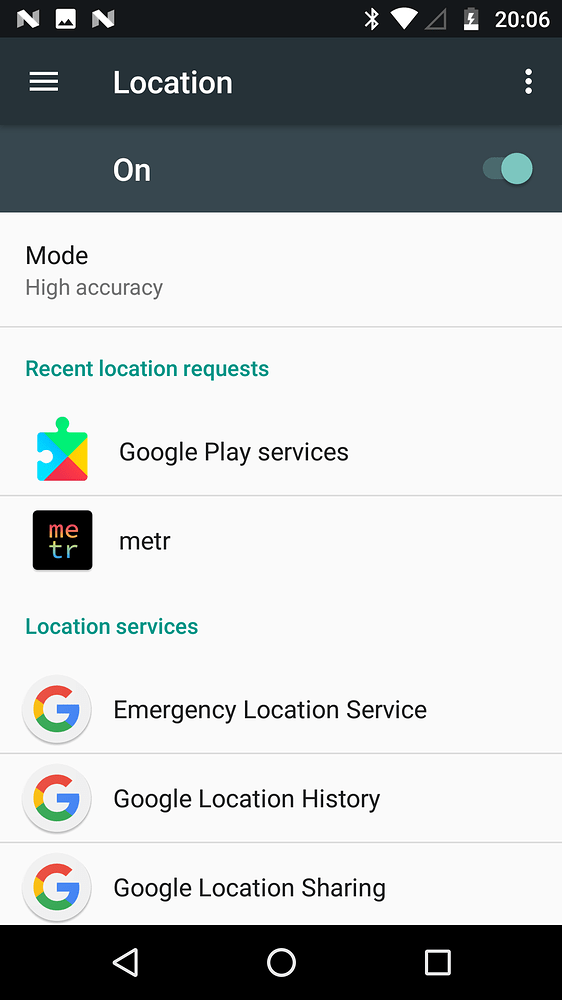
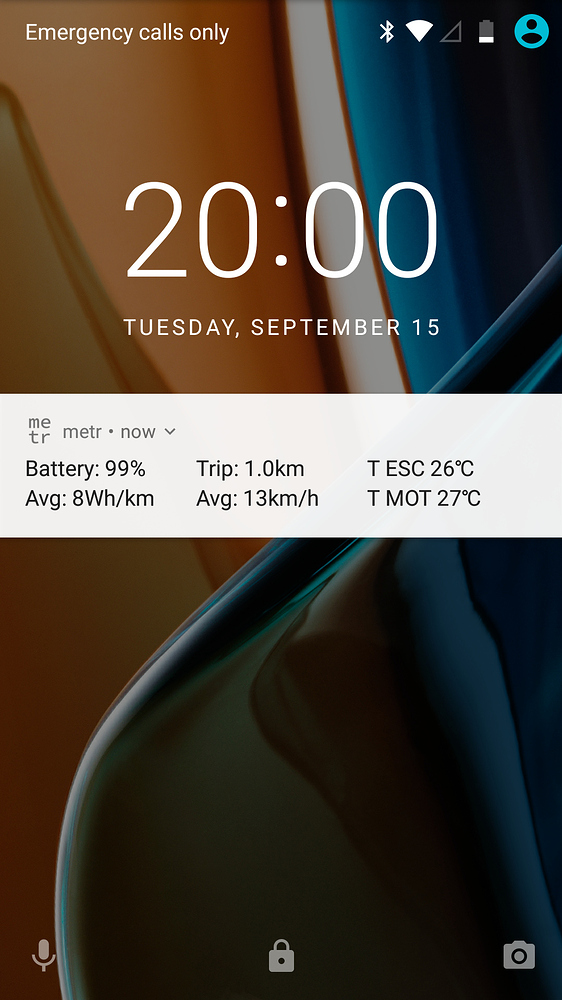
Location not recorded
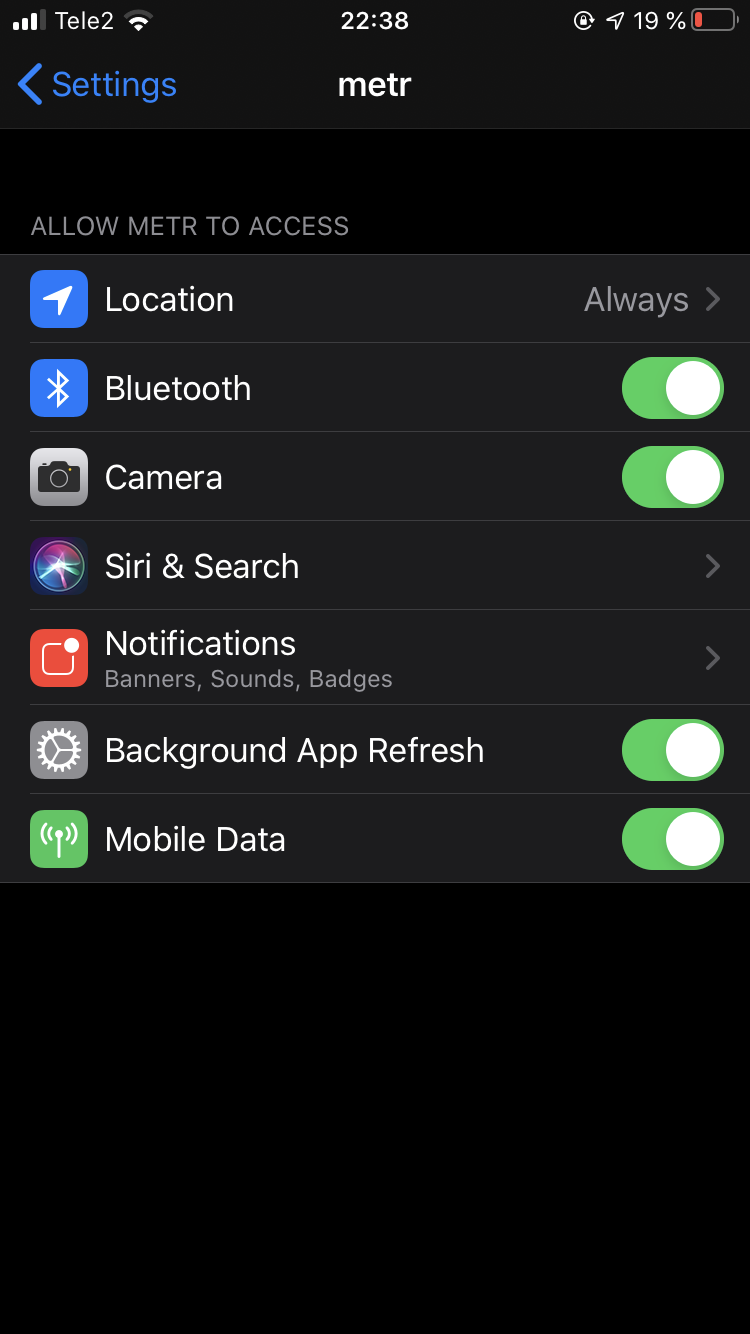
iOS: make sure access to location is Always allowed
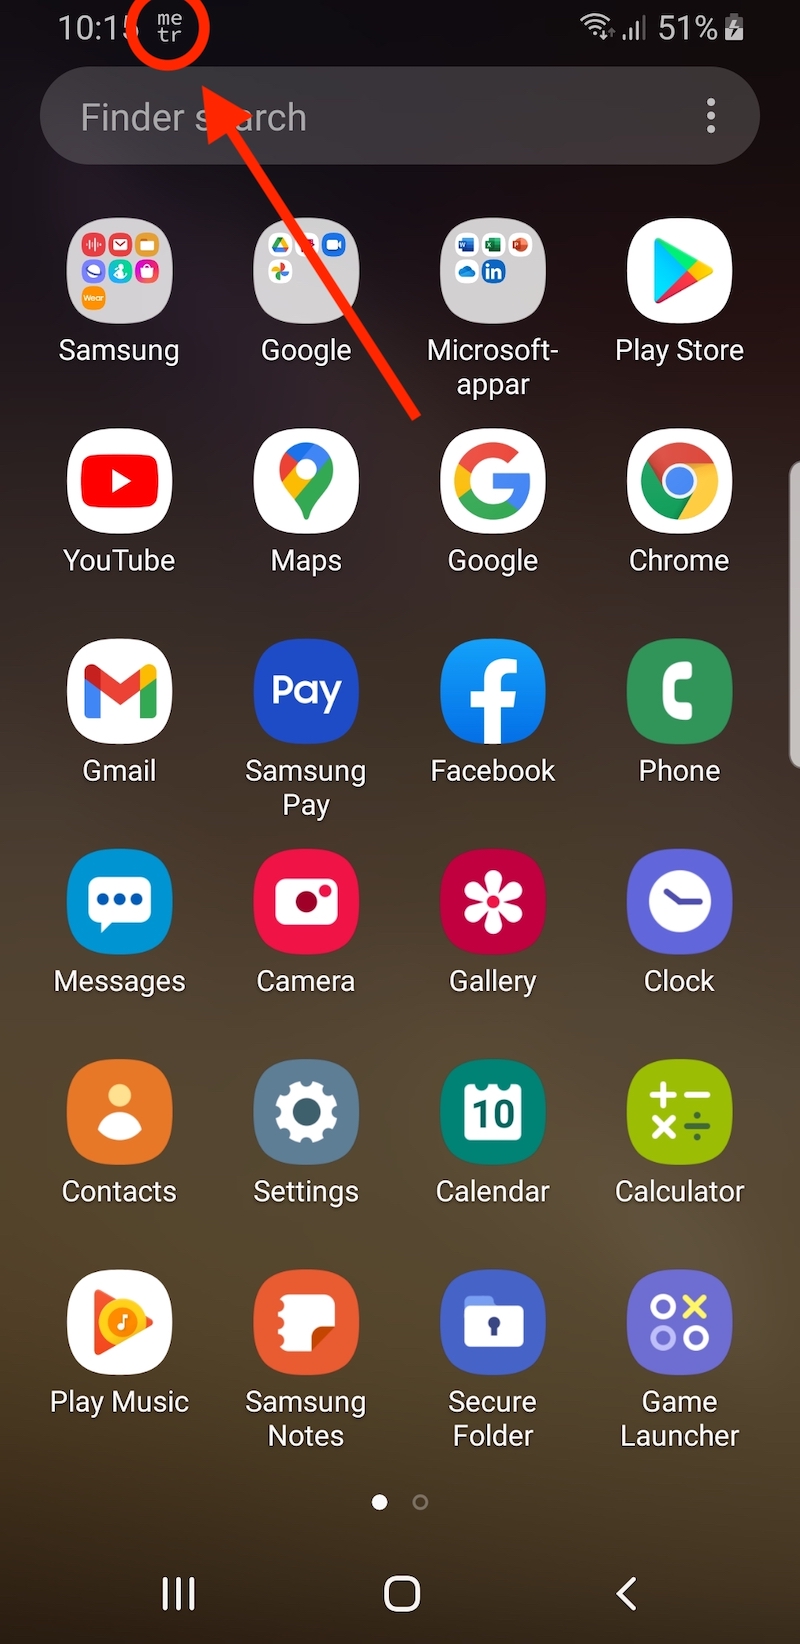
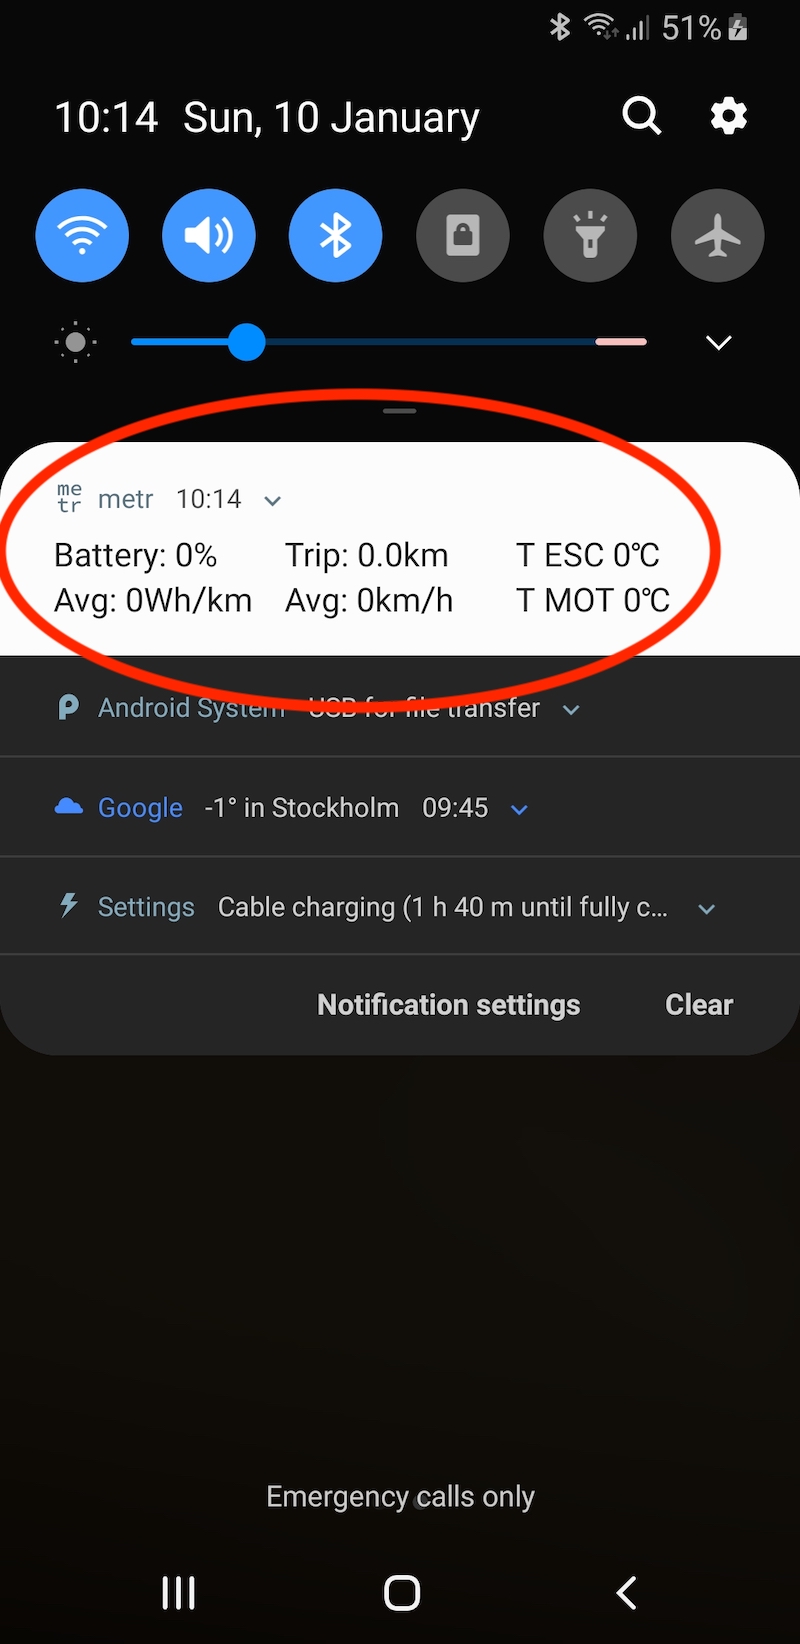
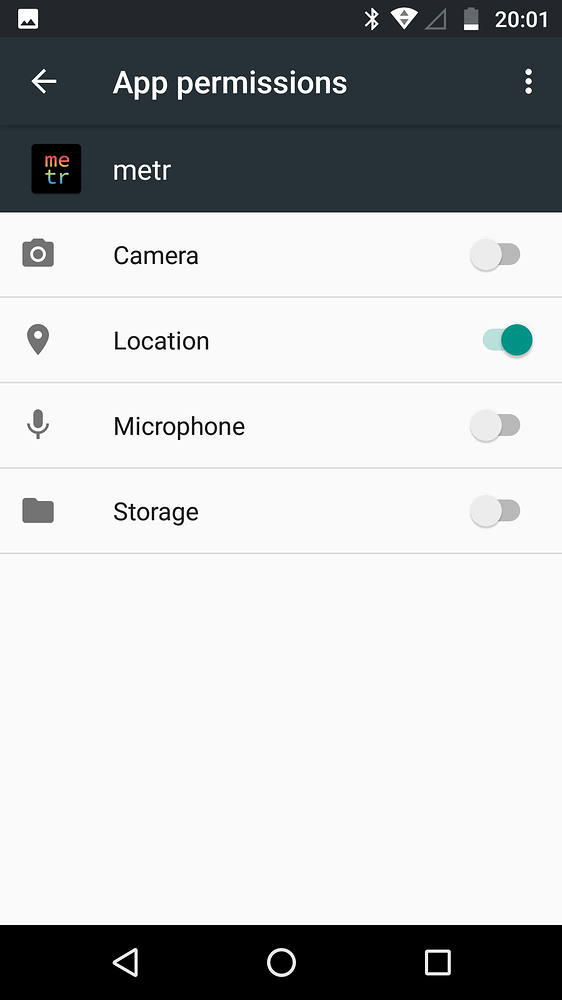
Android: make sure location permission is granted, location services are on, notifications are enabled and you have foreground notification on the lock screen
🛠 Bluetooth repairing
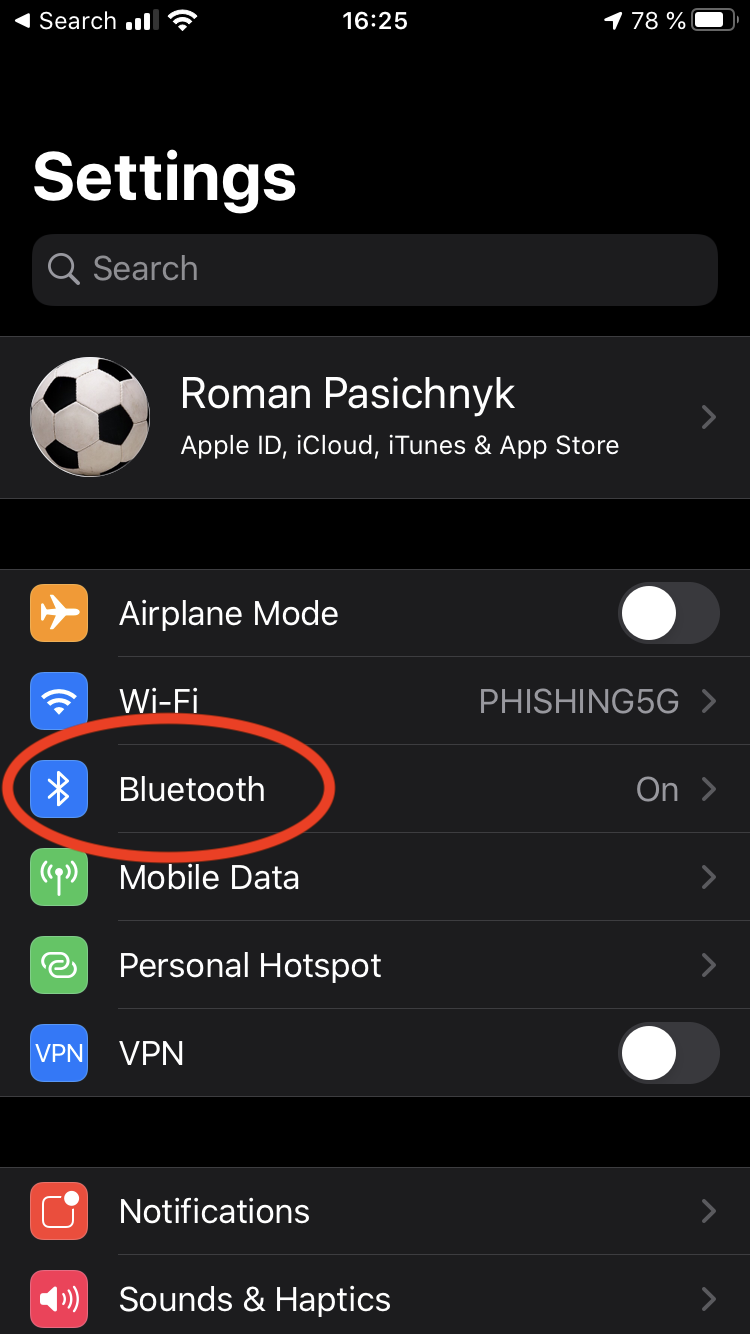
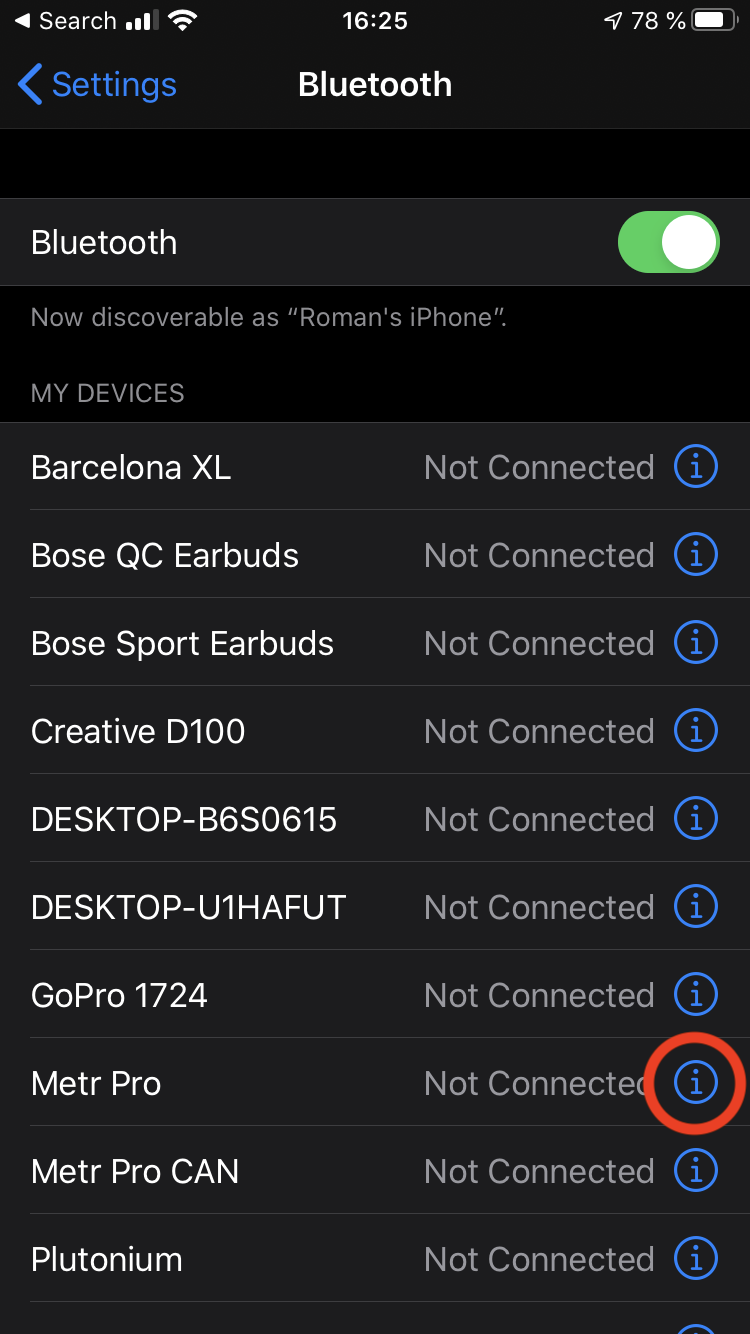
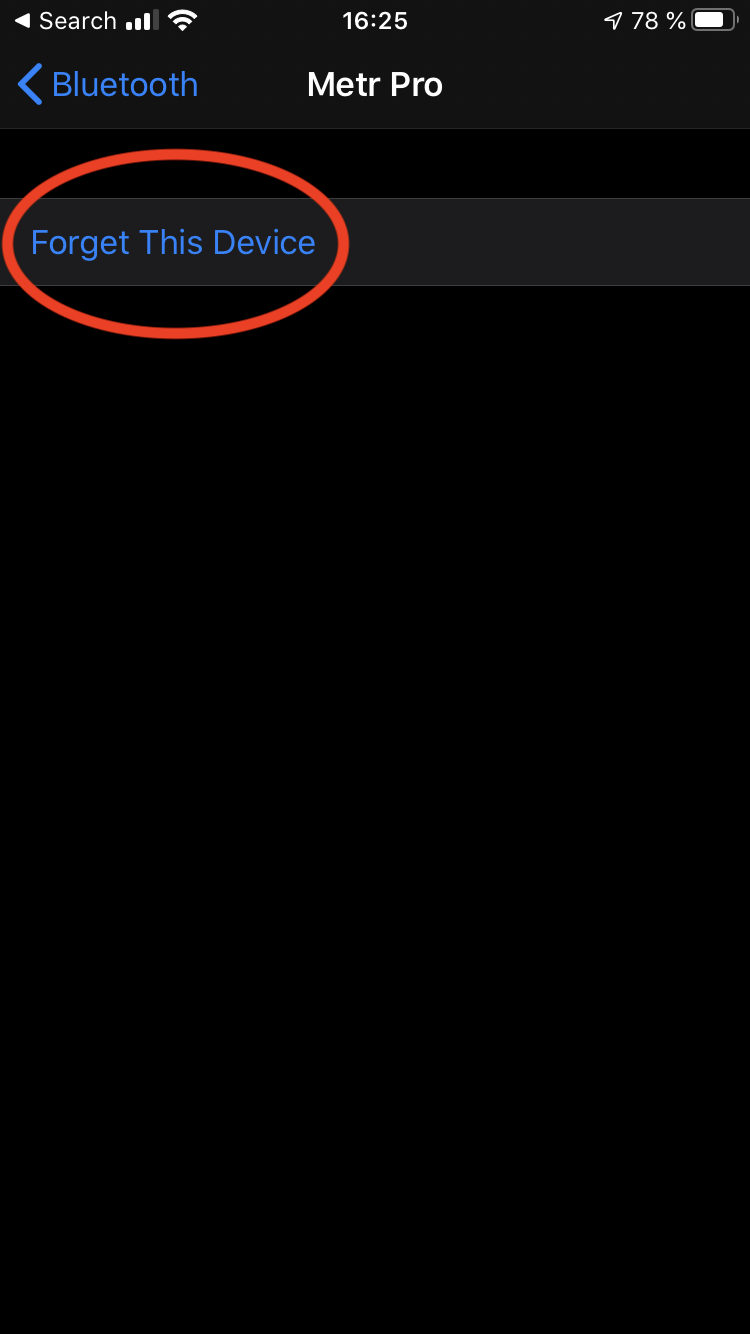
Sometimes after firmware upgrade you might encounter an issue when Metr Pro is not connecting. It might require removing Metr Pro from paired devices and connecting to it again. Please open System Preferences, navigate to Bluetooth, find Metr Pro and remove pairing information. After this, go back to Metr app and scan / connect.
This guide is written in Markdown and is available at
GitHub (contributions welcome)
forum.esk8.news (ask your questions here)